Tag: Gaming Hub
This Is The Police Investigation Guide And Case...
Managing the detective department in This Is The Police requires a keen eye for detail and strategic resource management. Players must carefully analyze crime scenes, assemble photo sequences correctly, and assign the right officers to close cases successfully. Understanding how to handle complex investigations efficiently ensures high department performance while keeping city streets safe.
Understanding the Basics of Case Investigations
Every investigation begins when a crime report arrives at the precinct desk. Players must assign a detective to gather initial evidence, frames, and witness statements from the scene. Having detectives with higher professionalism stats speeds up the gathering process and uncovers clues more reliably.
Once all Polaroid frames are collected, the core puzzle phase of the investigation begins. Players must arrange the sequence of events chronologically based on witness testimony and visual evidence. Matching details like clothing, weapons, and vehicles helps build a flawless timeline of the crime.
Strategies for Assembling Photo Sequences
To solve a case, read every witness testimonial carefully before placing the first frame. Clues hidden in the text often reveal specific environmental conditions, such as weather, time of day, or distinct suspect actions. Pay close attention to subtle details in the pictures, such as background objects or hand gestures.
If a sequence feels stuck, try removing all frames and re-evaluating the narrative from start to finish. Placing incorrect frames delays progress and wastes valuable detective hours. Once the correct sequence lights up green, you are ready to order an arrest.
Managing Detective Fatigue and Assignments
Assigning the right team to an investigation is just as crucial as solving the visual puzzle. Detectives who are overworked or tired make mistakes and perform poorly on arrests. Rotating squad members allows officers time to recover while keeping open files moving forward.
When sending detectives to apprehend a suspect, balance the team with both experienced veterans and junior officers. High-level detectives ensure smooth arrests without unnecessary casualties, while newer officers gain crucial experience. Always send adequate backup if the suspect is known to be armed or dangerous.
Maximizing Department Efficiency and Resources
Prioritizing cases based on severity helps maintain city trust and department funding. Violent crimes and high-profile burglaries should take precedence over minor offenses when detective availability is low. Keeping a steady flow of solved cases keeps City Hall satisfied and secures future budget increases.
Maintaining strong communication across shifts prevents open files from stalling overnight. Efficient planning allows your police force to handle daily emergencies while systematically closing major investigative files. Consistent success builds a reliable department capable of tackling Freeburg's toughest criminal networks.

Best Star Wars Lego Sets For Collectors And...
The LEGO Star Wars theme has captivated fans for decades, bridging the gap between intricate engineering and cinematic nostalgia. Whether you are a dedicated display collector seeking show-stopping centerpieces or an avid builder looking for a satisfying construction challenge, choosing the right model depends on your budget, space, and personal preferences.
The Pinnacle of Display: Ultimate Collector Series
For serious adult fans, the Ultimate Collector Series offers unparalleled detail, scale, and authenticity. Iconic ships like the Millennium Falcon and the Imperial Star Destroyer stand out as monumental achievements in brick design. Building these massive models requires time and patience, but the finished result serves as a breathtaking centerpiece for any collection.
Interactive Playsets and Master Builder Models
Builders who value minifigure selection and recreating movie scenes often lean toward Master Builder Series sets. Popular releases such as the Mos Eisley Cantina provide a sprawling footprint filled with rare alien minifigures, interior rooms, and interactive play features. These detailed environments balance display value with rich narrative storytelling from the Star Wars saga.
Display-Ready Helmets and Compact Models
If shelf space is limited, smaller display options like the Helmet Collection or mid-scale starships offer a sleek aesthetic without demanding massive space. Iconic helmets representing Darth Vader, Boba Fett, and Luke Skywalker offer structured, rewarding builds that fit easily on a desk or bookcase. These sets serve as an accessible entry point for enthusiasts starting their display collections.
Selecting the Ideal Set for Your Collection
Choosing the best set comes down to identifying whether you prefer high piece counts, minifigure variety, or compact display aesthetics. Exploring options like can help fans decide where to begin their brick-building journey. Ultimately, every build offers a unique way to celebrate the iconic characters and starships of the Star Wars galaxy.

Where To Find The Dowry BG3 Location And...
Navigating the chaotic aftermath of the burning inn at Waukeen's Rest presents players with numerous moral choices and hidden secrets in Baldur's Gate 3. Among these side encounters is the search for a family heirloom connected to Benryn, a man trapped inside the burning structure. Locating the hidden ring requires keen observation, clever spellcasting, or a fortunate passive check in the right spot.
Rescuing Benryn and Uncovering the Rumor
Before you can resolve the search for the missing heirloom, you must first save Benryn from the burning second floor. Break open the obstructed door, free him from the heavy wooden beam, and guide him safely out of the collapsing building. Once outside, speaking with him reveals his distress over his lost wife, Mirileth, and a hidden family dowry.
Locating the Dowry in Waukeen's Rest
To retrieve the item, make your way toward the western compound area behind the main structure. Look for a small barn area housing a large haystack at coordinates X:101 Y:627. As your party approaches the hay, an automatic Perception check triggers for each nearby companion. Passing the check reveals a hidden gilded chest containing the Dowry Ring.
Alternative Methods and Speak with Dead
If your entire active adventuring party fails the Perception check, you are not entirely out of luck. You can return to Mirileth's body on the upper floor of the neighboring building and cast Speak with Dead. Questioning her about hidden valuables reveals the location of the dowry directly, which lowers the required difficulty for discovering the chest.
Deciding the Fate of the Dowry Ring
Once you retrieve the gilded chest and collect the engraved gold ring, you must choose how to resolve the quest. Returning to Benryn allows you to give him the sentimental ring, providing closure to his tragic ordeal. Alternatively, players can decide to keep or sell the item for gold, though returning it completes the story thread honorably.

Best Handheld Console Of All Time Features and...
The evolution of portable gaming devices over the past few decades has transformed how players interact with digital entertainment on the move. From modest monochrome displays to vibrant high-definition screens capable of running modern home console titles, each generation has introduced revolutionary hardware concepts. Determining which platform deserves the title of the greatest handheld console requires analyzing key features, library depth, and long-term industry influence.
Pioneering Portability and Battery Efficiency
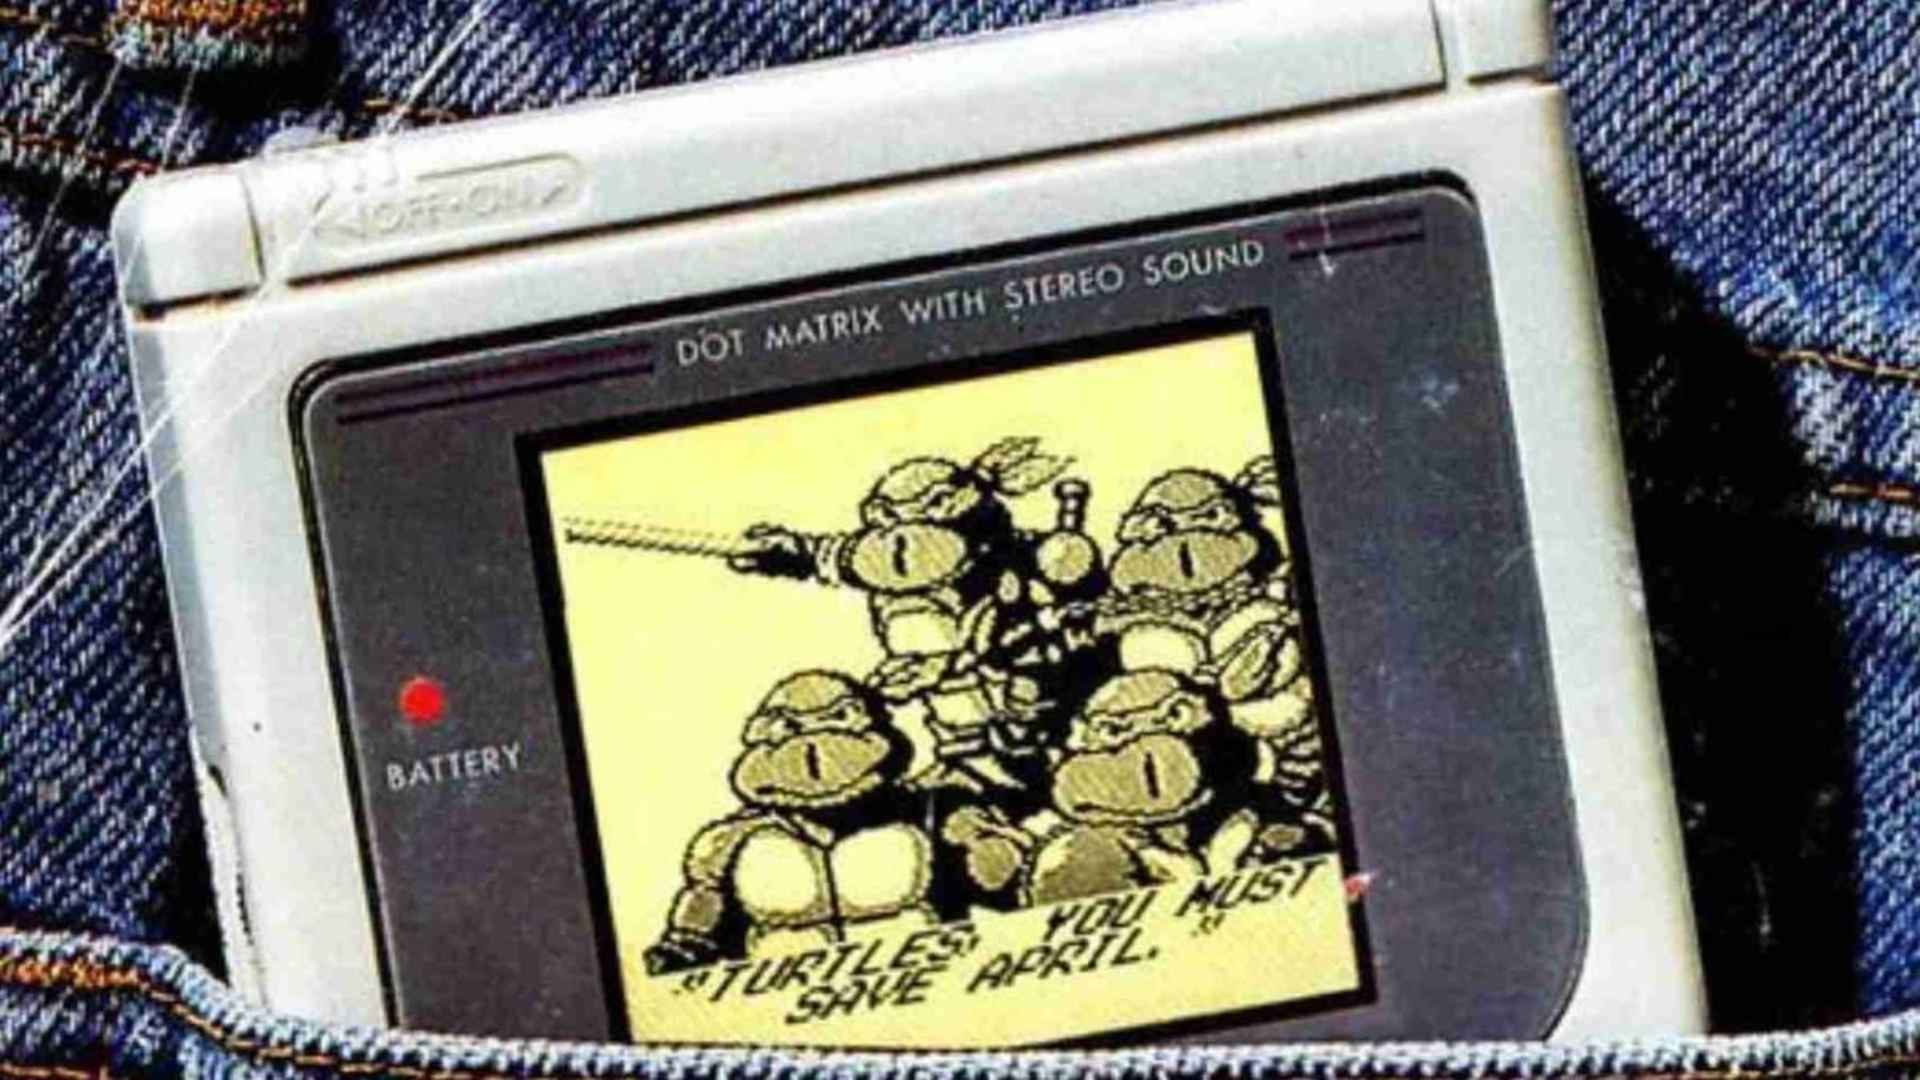
Early handheld systems laid the foundation for mobile entertainment by prioritizing durability, affordability, and efficient power consumption over raw graphical performance. Devices like the original Game Boy capitalized on a massive software library and exceptional battery life to outlast more technically advanced competitors. This strategic approach proved that convenient gameplay experiences often resonate more strongly with everyday consumers than demanding visual specifications.
As technology progressed, manufacturers introduced color screens and sleeker form factors without compromising the core portability that made these devices so popular worldwide. The long-term impact of these early platforms established dedicated handheld gaming as a permanent pillar within the global gaming market.
The Era of Dual Screens and Multimedia Integration
The mid-2000s marked a major shift as handheld devices incorporated innovative control schemes and multimedia capabilities to broaden their audience appeal. Systems such as the Nintendo DS featured dual displays and touch controls, which encouraged developers to experiment with entirely new game design mechanics. Concurrently, devices like the PlayStation Portable introduced high-resolution screens and optical disc media, bringing cinematic experiences directly to portable formats.
These technological advancements transformed portable devices into versatile media hubs capable of playing music, movies, and internet browsing alongside dedicated games. This era demonstrated that portable systems could push technical boundaries while introducing fresh interactive ideas that kept players engaged across diverse settings.
Hybrid Innovation and Modern Performance Standards
In recent years, the boundary between home consoles and portable gaming has blurred significantly thanks to hybrid system designs and powerful mobile processors. The Nintendo Switch demonstrated that players value the flexibility of seamless transition between television screens and handheld play without sacrificing title variety. Modern PC-based handhelds have further expanded these horizons by bringing full desktop libraries into compact, ergonomic form factors.
Today's devices focus heavily on high refresh rate displays, ergonomic grips, and cloud streaming compatibility to ensure premium performance anywhere. This modern hybrid approach represents the culmination of decades of hardware refinement, catering to both casual gamers and core enthusiasts.
Comparing Historical Legacy and Industry Impact
Evaluating the ultimate handheld platform involves weighing raw technical achievements against historical influence and software quality. While older systems set unmatched sales milestones and defined mainstream mobile culture, newer platforms offer unprecedented performance and versatility. Each significant platform contributed a vital step toward shaping contemporary gaming habits and expectations.
Ultimately, the legacy of any great portable system relies on how effectively it balanced hardware limitations with unforgettable game experiences. As hardware continues to evolve, the principles established by past handheld pioneers remain central to future gaming innovation.

How Long Is Red Dead Redemption Main Story...
Rockstar Games created an iconic Western masterpiece with Red Dead Redemption, capturing the end of the American frontier through the compelling story of John Marston. Players stepping into this open-world action adventure often wonder how much time they need to commit before reaching the final credits. Understanding the expected hours for both narrative progress and total game completion helps gamers plan their journey across the frontier effectively.
Main Story Playtime Expectations
Focusing purely on the core storyline of Red Dead Redemption generally requires around 17 to 20 hours of total playtime. Players who streamline their playthrough by skipping secondary activities and fast-traveling across regions can easily wrap up the narrative in this timeframe. However, rushing through the main missions without soaking in the surrounding atmosphere might lessen the overall narrative impact.
Story Mode Combined with Side Quests
Engaging in extra content alongside primary missions noticeably extends the time spent in the game world. Completing stranger tasks, hunting wild game, and taking part in mini-games usually pushes overall play duration to roughly 25 to 30 hours. Taking this balanced approach gives players a deeper look into the characters and lore while preserving a smooth narrative pace.
Achieving 100 Percent Completion
For dedicated players seeking full completionist status, Red Dead Redemption demands a significantly larger investment of time. Unlocking every outfit, discovering all treasure maps, completing ambient challenges, and clearing every hideout brings total playtime to approximately 45 to 50 hours. Mastering all requirements listed on the in-game checklist is a long but satisfying accomplishment for completionists.
Factors That Impact Your Playtime
Individual playstyle plays a huge role in determining how quickly you progress through the game. Traveling exclusively on horseback, spending time in saloons, or attempting tough hunting challenges naturally adds extra hours to your final record. On the other hand, experienced players or those using familiar mechanics can finish the main story in much shorter sessions.

Fallout World Map Post War And Major Locations
The post-apocalyptic universe of Fallout spans a vast geographic expanse across what was once the United States, transforming familiar regions into radioactive wastes and unique survivor territories. Understanding how these distinct areas fit together provides valuable context for fans exploring the lore across multiple games and media adaptations. From the arid deserts of the West Coast to the urban ruins of the East, each region features its own post-war political landscape and iconic hubs.
The Core West Coast Wastelands
The western territories represent the birthplace of post-war civilization in the Fallout series, centered around Southern California, Nevada, and Oregon. Key locations such as Shady Sands, the Hub, and Vault 13 served as crucial foundation points for regional rebuilding efforts. Over time, these areas saw the rise of major factions like the New California Republic, which gradually established structured governance across vast stretches of terrain.
Further east, the Mojave Wasteland around Las Vegas became a focal point for territorial conflict due to intact infrastructure like the Hoover Dam. Navigating these regional connections gives players a clearer picture of how post-war civilization slowly reshaped the former American southwest. The interplay between sprawling wilderness and densely populated urban centers defines the political dynamics of this region.
The East Coast Civilizations and Landmarks
On the Eastern Seaboard, post-war life developed under vastly different conditions, marked by severe radiation and heavy industrial damage. The Capital Wasteland surrounding Washington, D.C., contains iconic ruins like the Citadel, Rivet City, and numerous subterranean Vault-Tec facilities. Meanwhile, the Commonwealth in Massachusetts offers a unique dense urban layout featuring Diamond City, Goodneighbor, and the secretive Institute underground facility.
Appalachia in West Virginia highlights an earlier phase of post-war recovery, showcasing how automated systems and early survivors interacted before larger nations formed. Exploring these eastern locations reveals a more fragmented environment where smaller communities struggle against harsh environmental hazards. Each settlement serves as an isolated island of human activity within a hostile landscape.
Vault Networks and Unexplored Regions
Vault-Tec construct sites were scattered strategically across the entire continent, forming a hidden underground geography that shaped the post-war world. While major population hubs exist in explored game areas, large portions of the post-war map remain shrouded in mystery. Remote territories, such as northern commonwealths or southern marshlands, present fascinating possibilities for future exploration and expanding lore.
Understanding the placement of these subterranean shelters helps explain why certain surface areas flourished while others degenerated into lawlessness. The density of vaults directly influenced the technological recovery and survivor density in various states. As new stories emerge, the interconnected nature of the overarching post-war world map continues to evolve and intrigue fans worldwide.

How Many Planets Are In Borderlands 3 And...
Borderlands 3 revolutionized the series by taking players beyond the dusty deserts of Pandora and allowing them to pilot the Sanctuary III spaceship across the cosmos. In the base game's primary storyline, players can visit five distinct core planets, each featuring its own ecosystem, culture, and key story missions. Understanding how these worlds are structured helps players navigate the main campaign while discovering all the hidden secrets scattered across the galaxy.
The Core Base Game Planets
The primary journey in Borderlands 3 revolves around five main celestial bodies. Players begin their journey on Pandora before venturing out to the urban metropolis of Promethea and the serene monastical world of Athenas. Later chapters lead Vault Hunters to the treacherous swamps of Eden-6 and finally to the ancient Eridian homeworld of Nekrotafeyo.
Key Locations on Pandora and Promethea
Pandora remains the central hub for classic wasteland action, featuring massive open areas like The Droughts, Devil's Razor, and Konrad's Hold. Promethea offers a stark contrast with its futuristic cityscape, taking players through bustling zones such as Meridian Metroplex, Lectra City, and the high-tech Atlas HQ. Exploring both worlds is crucial for completing major story arcs and finding valuable crew challenges.
Exploring Eden-6, Athenas, and Nekrotafeyo
Eden-6 is a lush yet deadly jungle planet dominated by the Jakobs Corporation, hosting expansive areas like Floodmoor Basin and Voracious Canopy. Athenas is a smaller, focused planet consisting mainly of Stormhaven Square and ancient monastic structures. Nekrotafeyo serves as the endgame destination, filled with alien ruins across Desolation's Edge and Tazendeer Ruins.
Additional Space Destinations and DLC Worlds
Beyond the core five planets, players can travel to specialized orbital destinations such as the Skywell-27 asteroid facility and the Slaughterstar 3000 arena. Expansion content further broadens the galaxy map by introducing distinct DLC campaign locations like Xylourgos, Gehenna, and the casino station known as The Handsome Jackpot. These additional environments ensure that Vault Hunters always have fresh terrain and unique enemies to challenge.

Ark Teleport Player To Me Command Admin Command...
Managing a multiplayer server in ARK: Survival Evolved often requires administrators to intervene when players get stuck or need quick transport. Understanding how to use administrative console commands is essential for maintaining smooth gameplay and resolving player issues efficiently. Among the various management tools available, teleportation commands are among the most practical and frequently utilized features.
Understanding the Teleport Player Command Syntax
The primary command used to bring another player directly to your location is TeleportPlayerIDToMe. This console command requires the specific target player's SteamID64 or in-game Player ID to function correctly. Executing this command instantly moves the specified survivor to your exact coordinates across the map.
Administrators must first enable admin privileges on dedicated servers using the EnableCheats command followed by the server password. Once activated, commands can be entered directly into the cheat console interface during active gameplay sessions. Ensuring you have the correct Player ID prevents accidental movement of the wrong survivor.
Finding Player IDs Efficiently
To acquire a player's unique identifier, administrators can open the manager menu or inspect server logs. Alternatively, using administrative commands like ShowAdminManager provides a real-time list of all connected players alongside their corresponding IDs. Copying or noting down these numbers beforehand helps streamline administrative duties during busy sessions.
Accurate identification is crucial when managing populated servers to avoid disrupting uninvolved players. Keeping a quick reference list of active tribe members or frequent visitors can speed up emergency assistance. Prompt intervention helps resolve game-breaking glitches without forcing players to restart their progress.
Common Practical Applications and Safety Tips
Teleporting players to your position is helpful during community events, tribe reunions, or technical support scenarios. If a player becomes trapped inside terrain geometry or encounters severe latency bugs, pulling them to safety resolves the issue immediately. It also simplifies gathering players for boss fights or group base construction.
Before executing the teleport command, ensure that your surrounding environment is completely safe from wild predators or hostile hazards. Bringing an unprepared survivor into a dangerous biome like the Snow or Volcano region can cause immediate character death. Communicating with the player prior to teleportation prevents confusion and ensures a smooth transition.
Best Practices for Server Management
Using admin commands responsibly maintains fair gameplay and preserves trust within your gaming community. Teleportation should primarily be reserved for resolving technical glitches, hosting structured events, or providing emergency assistance. Overusing administrative powers can diminish the survival experience and survival challenges for regular players.
Maintaining clear server rules regarding admin assistance helps set appropriate expectations for all active participants. Documenting command usage in administrative logs ensures transparency among server staff members. Effective communication combined with proper admin command usage fosters a healthy, thriving ARK community environment.

Ark Teleport Player To Me Command Admin Command...
Managing a multiplayer server in ARK: Survival Evolved often requires administrators to intervene when players get stuck or need quick transport. Understanding how to use administrative console commands is essential for maintaining smooth gameplay and resolving player issues efficiently. Among the various management tools available, teleportation commands are among the most practical and frequently utilized features.
Understanding the Teleport Player Command Syntax
The primary command used to bring another player directly to your location is TeleportPlayerIDToMe. This console command requires the specific target player's SteamID64 or in-game Player ID to function correctly. Executing this command instantly moves the specified survivor to your exact coordinates across the map.
Administrators must first enable admin privileges on dedicated servers using the EnableCheats command followed by the server password. Once activated, commands can be entered directly into the cheat console interface during active gameplay sessions. Ensuring you have the correct Player ID prevents accidental movement of the wrong survivor.
Finding Player IDs Efficiently
To acquire a player's unique identifier, administrators can open the manager menu or inspect server logs. Alternatively, using administrative commands like ShowAdminManager provides a real-time list of all connected players alongside their corresponding IDs. Copying or noting down these numbers beforehand helps streamline administrative duties during busy sessions.
Accurate identification is crucial when managing populated servers to avoid disrupting uninvolved players. Keeping a quick reference list of active tribe members or frequent visitors can speed up emergency assistance. Prompt intervention helps resolve game-breaking glitches without forcing players to restart their progress.
Common Practical Applications and Safety Tips
Teleporting players to your position is helpful during community events, tribe reunions, or technical support scenarios. If a player becomes trapped inside terrain geometry or encounters severe latency bugs, pulling them to safety resolves the issue immediately. It also simplifies gathering players for boss fights or group base construction.
Before executing the teleport command, ensure that your surrounding environment is completely safe from wild predators or hostile hazards. Bringing an unprepared survivor into a dangerous biome like the Snow or Volcano region can cause immediate character death. Communicating with the player prior to teleportation prevents confusion and ensures a smooth transition.
Best Practices for Server Management
Using admin commands responsibly maintains fair gameplay and preserves trust within your gaming community. Teleportation should primarily be reserved for resolving technical glitches, hosting structured events, or providing emergency assistance. Overusing administrative powers can diminish the survival experience and survival challenges for regular players.
Maintaining clear server rules regarding admin assistance helps set appropriate expectations for all active participants. Documenting command usage in administrative logs ensures transparency among server staff members. Effective communication combined with proper admin command usage fosters a healthy, thriving ARK community environment.

Rarely Affectionate Part 2 Best Choice And Possible...
The companion mission Rarely Affectionate Part 2 in Honkai Star Rail presents players with an emotional dilemma regarding the ultimate fate of Pascal, a sentient robot. After venturing through Jarilo-VI to find replacement parts and repair the automaton, Trailblazers are forced to make a pivotal choice. You must decide whether to support Clara’s compassionate approach or align with Svarog’s logical recommendation.
Understanding Clara's Decision
Choosing Clara's option means installing a protective program while preserving Pascal's emotional intelligence and individual memories. Clara believes in granting the robot emotional autonomy and is willing to take full responsibility for its recurring maintenance. However, this choice means Pascal remains vulnerable to periodic memory corruption, placing an ongoing emotional burden on Clara.
Understanding Svarog's Decision
Siding with Svarog results in formatting Pascal's data and integrating its core system into the robot settlement's main network. This choice permanently removes Pascal's individual personality to eliminate the danger of corruption and ensure public safety. While it brings initial sorrow to Clara, it provides a secure and stable resolution without long-term risk.
Comparing Outcomes and Rewards
Regardless of the path selected, the base quest rewards remain identical, granting players Stellar Jades, Trailblaze EXP, and character ascension materials. The main differences lie in the follow-up daily missions and the emotional narrative resolution. Siding with Clara preserves a unique bond, whereas trusting Svarog ensures safety and peace across the settlement.
Which Option Is the Best Choice
Determining the best choice depends on whether you prioritize emotional empathy or practical safety. Players looking to protect Clara from future heartache often prefer Svarog's solution as the most responsible outcome. Meanwhile, those who value AI self-determination side with Clara to honor Pascal's distinct personality.

Can You Find Atreus After Ragnarok And Where...
Completing the main storyline of God of War Ragnarok leaves players with a vast open world to explore, but many wonder if Atreus can still be encountered during post-game activities. As Kratos continues his journey through the Nine Realms alongside Freya, the young archer's absence is immediately noticeable. Understanding what happens to Atreus after the final battle sheds light on both the story's narrative direction and gameplay structure.
The Narrative Reason Behind Atreus's Absence
At the conclusion of the story, Atreus makes a pivotal decision to embark on a personal quest across distant lands. His goal is to track down and save the surviving Giant souls scattered beyond the known realms. Because his journey takes him far away from Kratos and his allies, he parts ways with his father in an emotional final scene.
This narrative choice directly explains why players cannot locate Atreus anywhere in the Nine Realms once the credits roll. His departure is a permanent story milestone rather than a temporary side activity. Consequently, there are no secret regions or hidden cutscenes where you can meet him again during the endgame free roam.
Where to Find Traces of Atreus in the Post-Game
Although Atreus is physically absent from the world, players can still find meaningful references to him throughout the endgame. Visiting Jotunheim allows Kratos and Freya to interact with Angrboda, who provides updates on how Atreus is faring on his solitary journey. These small conversations offer emotional closure and reassure players that Atreus is safe.
Additionally, traveling to Sindri's House or key locations in Midgard triggers dialogue between Kratos and Freya regarding the young God's growth. Characters frequently reminisce about his contributions to the war against Odin and discuss his future. These subtle details help maintain his presence in the ongoing narrative without requiring a physical appearance.
How Gameplay Changes Without Atreus as a Companion
With Atreus gone on his quest, Freya permanently takes over the role of Kratos's companion for all remaining side quests, collectibles, and endgame boss fights. She possesses a distinct set of abilities, runic summons, and arrows that replace Atreus's combat tools seamlessly. This ensures that players still have full access to elemental combo opportunities during high-level encounters.
Freya also offers unique commentary on post-game content, such as cleaning up lingering Asgardian remnants and challenging tough Valkyries. Her perspectives on the realms bring fresh context to Kratos's ongoing efforts to rebuild peace. Players looking to clear their map will find her assistance just as versatile in combat as Atreus's previous skill set.
Will Atreus Return in Future Franchise Installments?
The intentional separation of Kratos and Atreus sets up intriguing possibilities for future entries in the God of War series. By leaving his home realm behind, Atreus opens the door for standalone adventures focusing entirely on his quest for the Giant souls. His departure marks the beginning of a new chapter rather than a definitive end to his character arc.
For now, fans can rest assured that Atreus's story is far from complete even if he cannot be found in Ragnarok's endgame. Players should focus on completing remaining favor quests and discovering all hidden lore scattered across the Nine Realms. Watching Kratos adapt to his new responsibility alongside Freya offers a satisfying conclusion to this Norse saga.

Best Sports Betting App West Virginia and What...
West Virginia was one of the early pioneers in legalizing sports wagering following the repeal of PASPA, establishing a well-regulated framework for digital sportsbooks. Today, sports fans in the Mountain State have access to several licensed mobile platforms offering competitive lines, robust market depth, and reliable mobile performance. Navigating these choices requires an understanding of regulatory safety, app usability, and local wagering rules.
Understanding the West Virginia Sports Betting Framework
The West Virginia Lottery Commission oversees all sports wagering operations within state borders to protect consumers. Licensed operators must partner with local land-based casinos, ensuring that every platform adheres to strict fairness and financial security standards. This framework guarantees that player funds remain safe and that identity verification processes prevent unauthorized access.
Bettors benefit from a controlled market that supports full mobile registration without requiring in-person sign-ups. As a result, users can download an app, verify their account, and begin wagering from anywhere inside state lines. This accessibility has fueled continuous growth in digital sports wagering across the region.
Essential Features of Top Mountain State Betting Apps
When selecting a mobile sportsbook in West Virginia, user interface design and app speed are critical factors. Modern applications must process live odds quickly to ensure smooth in-play wagering during high-stakes games. Intuitive navigation menus allow users to seamlessly locate college sports, professional leagues, and niche events.
Banking convenience is another defining attribute of quality mobile platforms. Leading operators support trusted payment methods, including online banking transfers, major credit cards, and specialized e-wallets. Assessing platforms like m88 provides insight into how streamlined user interfaces and versatile cashier options improve overall wagering convenience.
Wagering Options and College Sports Regulations in WV
West Virginia sportsbooks stand out for their flexible rules regarding collegiate sports wagering. Unlike some states that restrict bets on local universities, West Virginia permits full wagering on state college teams like West Virginia University and Marshall University. Fans can place pre-match spreads, totals, and player props on both national and local collegiate matchups.
Beyond college athletics, top mobile apps cover an extensive range of international and domestic leagues. Bettors can explore traditional moneyline wagers, multi-leg parlays, futures markets, and live micro-betting features. This broad market depth caters to both casual fans and experienced analytical bettors.
Tips for Safe and Responsible Wagering
Evaluating welcome bonuses and promotional offers requires careful attention to terms and conditions. Many sportsbooks offer bonus bets or deposit matches for new accounts, but these often carry specific rollover requirements. Checking playthrough obligations ensures bettors maximize the real value of promotional incentives.
Responsible gambling tools are integrated directly into all licensed West Virginia betting apps to promote healthy habits. Users can set daily deposit limits, time restrictions, or utilize self-exclusion programs whenever necessary. Utilizing these safety settings helps maintain a balanced and enjoyable wagering experience.

Harvest Moon A Wonderful Life Characters Complete Cast...
Harvest Moon: A Wonderful Life remains a cherished classic in the life-simulation genre, largely due to its memorable cast of characters in Forgotten Valley. Unlike many traditional farming simulators, this title places heavy emphasis on personal relationships, aging, and community progression over several virtual decades. Understanding the complete cast and their distinct roles helps players navigate marriage options, build long-lasting friendships, and unlock unique story events throughout their journey.
The Core Marriage Candidates
The original GameCube release featured prominent bachelorettes such as Celia, Muffy, and Nami, each offering a distinct lifestyle and storyline. Later iterations and remakes expanded these options to include Lumina and several eligible bachelors such as Marlin, Rock, and Gustafa. Choosing a spouse is a central mechanic because it directly influences your child's personality and potential career path as the years pass.
Key Valley Residents and Business Owners
Beyond romance, Forgotten Valley is populated by quirky locals who manage essential services and town routines. Figures like Griffin and Muffy operate the local Blue Bar, while Tei and Lou welcome visitors at the Lei-Over Inn. Visiting Van, the traveling merchant, allows farmers to buy rare goods and sell valuable items accumulated from crop harvests or mining.
Scholars, Artists, and Eccentric Neighbors
The community also thrives on its diverse personalities, ranging from passionate scholars to creative recluses. Carter and Flora manage the archaeological dig site near the waterfall, where players can discover ancient relics. Meanwhile, characters like Cody the metal artist and Daryl the eccentric scientist add depth and unexpected dialogue to daily life in the valley.
The Lifelong Impact of Village Relationships
Building friendships with neighbors yields practical rewards, including unique tools, recipes, and rare cutscenes. As time moves forward in chapters, the characters visibly age and adjust their daily routines to match their life stages. Developing a strong rapport with every resident enriches the overall storytelling experience and truly defines what makes life in the valley so special.

Best Age Of Empires 2 Civilization And Civilization...
Choosing the best Age of Empires 2 civilization depends heavily on map type, playstyle, and game mode. While some factions excel on open land maps, others dominate closed arenas or naval engagements through powerful bonuses. Understanding the specific advantages of top-tier civilizations allows players to build effective strategies and secure victory.
Franks and Cavalry Dominance
The Franks remain one of the most beginner-friendly and reliable civilizations in the game due to their powerful heavy cavalry bonuses. Their knights automatically gain extra hit points, making early Castle Age aggression extremely lethal against unprepared opponents. Free mill upgrades and faster-working Castles ensure a seamless economic transition while spamming heavy units.
In addition to strong military traits, cheap Castles provide excellent map control and defensive security throughout mid-game battles. Players can easily secure vital resources while pushing forward with unique units like the Axeman. Master their eco setup to unleash devastating knight rushes against enemy bases.
Mayans and Archery Superiority
Mayans excel as a premiere archer civilization, utilizing reduced unit costs to flood the battlefield with foot archers. Their longer-lasting resources provide a subtle but massive economic edge during extended Imperial Age matches. Combining inexpensive archers with sturdy Eagle Warriors creates a versatile army capable of raiding and defending effectively.
Their unique unit, the Plumed Archer, offers exceptional mobility and high durability compared to standard ranged units. This unit allows Mayan players to hit enemy eco hotspots and retreat before counter-units arrive. Managing this hit-and-run tactic guarantees massive disruption to enemy production lines.
Britons and Ranged Range Advantage
Britons are widely celebrated for their unprecedented archery range bonuses, allowing archers to outrange defensive towers and Castles. Town Centers costing less wood gives Britons a fast, thriving boom in the Castle Age to support constant army production. This economic stability makes them an excellent choice for team games and defensive playstyles.
Longbowmen act as terrifying sniper units when massed behind strong chokepoints or defensive walls. Supported by siege engines or infantry, they destroy approaching cavalry forces long before engagement occurs. Proper positioning and strategic scouting make the Britons nearly unbreakable in late-game scenarios.
Mongols and Fast Early Aggression
Mongols are feared for their extremely rapid early game transitions driven by faster hunting bonuses. This massive early food surge allows players to execute swift Scout rushes that catch opponents completely off guard. Securing early map control gives Mongol players the space needed to transition into their unstoppable late-game composition.
Their unique Mangudai unit combines rapid speed with high bonus damage against siege equipment. Paired with fast-moving siege units, a fully upgraded Mongol army can flatten fortifications in seconds. Mastering their fast Dark Age hunting build is the key to unlocking their full aggressive potential.

Vegetarian Stew Disney Dreamlight Valley Recipe And Ingredients
Cooking in Disney Dreamlight Valley provides players with a fun and rewarding way to restore energy, build friendships, and complete important quests. Among the many meals available to craft at Remy's kitchen, Vegetarian Stew stands out as a wholesome three-star dish. Knowing the exact ingredients required ensures you can quickly whip up this meal without wasting valuable garden resources.
Required Ingredients for Vegetarian Stew
Preparing Vegetarian Stew requires three specific ingredients combined at a cooking station with one coal ore. You will need one Carrot, one Onion, and one Potato to successfully complete the recipe. Using substitute vegetables will result in a completely different meal, so accuracy is key.
Carrots can be grown early in the game by purchasing seeds from Goofy's Stall in the Peaceful Meadow. Onions are unlocked later when you clear access to the Forest of Valor and upgrade its local market stall. Potatoes represent the final component, which players can buy as seeds or harvest directly in the Forgotten Lands.
How to Prepare and Cook the Meal
To cook Vegetarian Stew, head to any cooking station or Remy's Restaurant with your gathered produce. Toss the Carrot, Onion, and Potato into the pot together along with a piece of coal to start cooking. Within seconds, your three-star meal will be ready and automatically added to your inventory.
If you prefer to cook in bulk, stock up on extra seeds to maintain a steady garden output. Keeping extra ingredients stored in chests near your cooking station saves time when preparing multiple dishes. Cooking higher volumes of meals helps support longer exploration trips across distant valley biomes.
Energy Benefits and Star Coin Value
Consuming Vegetarian Stew provides a solid energy boost, making it ideal for stamina management while mining or fishing. It fills a significant portion of your energy bar, helping you reach the extra movement speed zone faster. Players looking to maintain high productivity will find it to be a reliable food option.
Additionally, Vegetarian Stew can be sold at Goofy's Stall for a decent return of Star Coins if you need quick cash. While it may not be the most lucrative dish in the game, its simple ingredients make it cost-effective to produce. Gifting it to villagers who request it as a daily favorite also accelerates friendship leveling.
Tips for Efficient Vegetable Farming
To maximize your ingredient production, always bring a companion with the Gardening role when harvesting your crops. Gardening companions give you a chance to receive bonus yields for every crop picked, doubling your harvest efficiency. Planting seeds in their native biomes will also reduce the total time required for them to grow fully.
Maintaining a well-organized farm plot near Goofy's Stalls makes replanting and selling extra crops convenient. Efficient crop management allows you to always have carrots, onions, and potatoes ready for your next culinary session in Disney Dreamlight Valley.

How To Evolve Haunter Violet Evolution Method And...
Evolving Haunter into Gengar remains one of the most classic transformation processes in Pokémon Violet. While many Pokémon evolve simply by leveling up, Haunter requires specific conditions to trigger its evolution. Understanding these requirements helps trainers quickly add the powerful Ghost and Poison-type Pokémon to their Paldean Pokédex.
The Core Trade Evolution Method
The standard way to evolve Haunter in Pokémon Violet is through player-to-player trading. When you initiate a link trade online or locally with another player, your Haunter will evolve into Gengar immediately upon arriving in the other trainer's game. To keep your original Pokémon, you can simply ask your trading partner to return it in a second exchange.
In-Game Solo Trade Requirement
If you prefer playing offline or do not have a trading partner, Pokémon Violet offers a convenient solo alternative. Head to the city of Levincia and locate an NPC named Blossom near the central battle court plaza. She will offer to trade her Haunter in exchange for a Pincurchin. Catching a Pincurchin on the nearby beaches and completing this in-game trade will trigger the evolution directly in your party.
Locating Haunter in Paldea
Before you can initiate any evolution process, you must first obtain a Haunter. Haunter can be found roaming wild in areas such as North Province Area One, particularly at night. Alternatively, you can catch a Gastly in the early game and level it up to level 25, where it naturally evolves into Haunter.
Preparing Gengar for Battle
Once your Haunter successfully evolves into Gengar, it gains substantial boosts to its Special Attack and Speed stats. Unlike some other evolutionary lines, Haunter does not require held items like Everstones during the trade unless you want to intentionally prevent its evolution. Mastering these evolution steps ensures a seamless addition of Gengar to your competitive or casual team in Pokémon Violet.

Tears Of The Kingdom Official Art Gallery And...
The Legend of Zelda: Tears of the Kingdom captured players worldwide with its expansive world and striking visual identity. Beyond the engaging gameplay mechanics, the visual design provides a fascinating look into the creation of Hyrule's sky islands and ancient ruins. Fans interested in the creative process can explore the official art gallery and concept illustrations that shaped this landmark release.
Exploring the Official Concept Visuals
Official concept art offers crucial context regarding character redesigns and landscape architecture. Early sketches reveal how developers envisioned the Zonai technology before finalizing its distinct functional appearance. These visual documents help fans appreciate the massive iteration process behind every landmark in Hyrule.
Additionally, character design sheets showcase the meticulous detail placed on costumes and equipment. Subtle patterns on ancient armor sets tell subtle stories about past civilizations and cultures. Studying these illustrations provides a deeper understanding of the overall visual narrative built into the game.
Key Highlights of the Hyrule Artwork Collection
The visual collection highlights key story moments alongside detailed environment studies. Key art pieces focus heavily on mood, contrast, and dramatic lighting to set the tone for key questlines. Environmental paintings demonstrate how the artists balanced new floating landmasses with the familiar terrestrial geography below.
Many illustrations focus on key assets such as Zonai devices, vehicle parts, and localized flora. Browsing through these archived works gives players a comprehensive breakdown of how basic mechanics were visually communicated. It highlights the seamless collaboration between art directors and game designers.
Where to View Official Art Books and Galleries
Nintendo regularly publishes physical art books that compile thousands of official production illustrations. Collectors can find detailed commentary from the visual design team alongside high-resolution renders and unreleased sketches. Online archives and collector editions also serve as excellent digital galleries for fans worldwide.
Exhibitions and promotional art books provide access to rare promotional materials released during the game's marketing campaign. Browsing these collections is a great way to revisit memorable moments from the adventure. For art enthusiasts, these published collections remain an essential resource for studying modern video game aesthetics.

Best Single Player Games On Gamepass Guide To...
Xbox Game Pass has become one of the most comprehensive platforms for single-player gaming, offering access to expansive role-playing epics, intimate narrative adventures, and intense action titles. Navigating the massive library can be daunting, but focusing on standout solo experiences helps players find unforgettable journeys. Whether you want deep world-building, high-octane combat, or quiet storytelling, the service consistently delivers top-tier single-player content.
Immersive Story-Driven RPGs
For gamers seeking sprawling narratives and player agency, Game Pass features exceptional role-playing titles that absorb dozens of hours. Games like Starfield and The Outer Worlds allow players to shape their own galactic destinies through detailed dialogue choices and customizable character builds. These titles offer rich lore and memorable companion interactions that make solo exploration deeply rewarding.
High-Octane Action and Combat Games
If you prefer mechanical precision and adrenaline-fueled encounters, the platform offers dynamic action games that test your skills. Titles like Doom Eternal and Lies of P focus heavily on mastery over movement, timing, and offensive strategy. Defeating challenging bosses alone provides a distinct sense of accomplishment that multiplayer titles rarely replicate.
Atmospheric Indie and Narrative Gems
Beyond massive blockbuster releases, single-player gaming thrives in smaller, artfully crafted independent titles. Games such as Hollow Knight and Celeste deliver tightly designed gameplay paired with hauntingly beautiful soundtracks and emotional story arcs. These experiences prove that compelling solo adventures do not require massive budgets to leave a lasting impression.
Strategic and Simulation Adventures
Players who enjoy methodical pacing and deep tactical thinking will find plenty of solitary simulation and strategy titles on Game Pass. Games like Persona 5 Royal blend daily life simulation with complex turn-based combat, offering a uniquely structured solo campaign. Taking your time to plan moves and optimize strategies creates a relaxed yet deeply engaging gaming routine.

Disney Dreamlight Valley Collect Em All Quest Guide...
Disney Dreamlight Valley features a variety of multi-stage missions that challenge players to explore every corner of their magical realm. Among the most recognizable multi-part adventures is the Collect Em All questline given by Buzz Lightyear. Players must search high and low across biomes and villager houses to recover missing Alien Toys that have strayed from Woody's Carousel.
Starting the Collect Em All Questline
To initiate the questline, players need to locate Buzz Lightyear in the valley after unlocking him. Speaking to him begins the initial task titled Collect Em All Little Green Men, which sends players on a hunt for scattered toy figures.
This mission requires patience because the collectibles do not appear all at once. Instead, players must wait real-world time as additional toys gradually spawn across different biomes over several days.
Tracking Down the Alien Toys
Finding every toy demands careful observation throughout the valley's diverse environments and villager homes. Early stages send players searching outdoors in locations like the Plaza, Peaceful Meadow, and Dazzle Beach.
Subsequent stages, such as Strangers from the Outside and Attic Mode, shift the search indoors into specific character houses, the Dream Castle, and Chez Remy. Keep an eye out for small sparkles on the ground, which indicate a hidden object tucked behind furniture or decor.
Managing Quest Time Gates and Spawns
One key aspect of this questline is its time-gated structure designed to prevent instant completion. After collecting the initial wave of toys, players must wait roughly 24 to 36 hours before the remaining set spawns.
If you cannot find the final remaining toys immediately, check back daily or restart the game to refresh the spawns. Persistence is essential, as some toys hide in tricky spots like behind doors or beneath curtains inside homes.
Quest Completion Rewards and Final Wrap-Up
Returning all 15 Alien Toys to Buzz Lightyear brings closure to each individual phase of the mission series. Completing these tasks rewards players with Space Ranger Supply Kits packed with useful crafting materials and resources.
Finishing the final stage, Collect Em All Attic Mode, fully resolves Buzz's alien retrieval troubles. Beyond the tangible items, completing the series awards substantial friendship points with Buzz Lightyear to help max out his character progression.

Games Like Door Kickers 2 For Tactical Strategy...
Tactical strategy fans who enjoy the real-time pausable action of Door Kickers 2 often seek games that deliver a similar blend of precise planning and intense execution. Finding titles that capture the same level of room-clearing tension and squad management requires looking closely at game mechanics. Whether you prefer top-down tactical shooters, turn-based squad tactics, or immersive close-quarters simulations, several outstanding alternatives offer deep strategic gameplay.
Top-Down Tactical Alternatives
For players who love the top-down perspective, games like Frozen Synapse provide a pure test of tactical foresight. You command a squad by issuing simultaneous turn-based orders, predicting enemy movements in complex urban layouts. This emphasis on positioning and line of sight mirrors the calculated breach-and-clear gameplay that makes modern tactical titles so engaging.
Another excellent option in this category is Breach & Clear, which focuses specifically on counter-terrorism operations. Players customize special operations teams, select gear, and plan room entries with careful timing. The game balances accessible controls with deep tactical decision-making, making it ideal for fans of close-quarters combat.
Turn-Based Squad Strategy Games
If you prefer turn-based execution over real-time pausing, the XCOM series offers an unmatched tactical experience. Managing cover, flanking routes, and specialized gear requires long-term strategic thinking alongside immediate battlefield choices. The high stakes of squad permanent loss add emotional weight to every command you issue.
Jagged Alliance 3 brings classic mercenary management into a modern strategic framework with rich tactical combat. Players must manage gear, squad morale, and position units effectively to control the battlefield. Its focus on detailed ballistics and cover mechanics appeals directly to strategy enthusiasts who appreciate realistic combat dynamics.
First-Person Tactical Breach Simulators
For those who want to experience room clearing from a direct, immersive perspective, Ready or Not is a standout tactical shooter. It emphasizes realistic SWAT rules of engagement, dynamic room breaching, and strict team coordination. Planning entries and securing objectives requires the same methodical pacing as top-down strategy games.
Similarly, Rainbow Six Siege offers intense tactical gameplay centered around breach mechanics and environment destruction. Teams must analyze layouts, use gadgets, and execute coordinated pushes to defeat defensive positions. The emphasis on spatial awareness makes it a great choice for players transitioning from real-time strategy to action-oriented tactics.
Choosing the Right Strategy Experience
Selecting the best alternative depends on whether you prefer pauseable real-time planning or deliberate turn-based execution. Each of these titles captures the core appeal of tactical squad command through unique mechanics and settings. Exploring these diverse games will satisfy your itch for high-stakes decision-making and precise tactical execution.

The Last of Us Tools Locations and Weapon...
Surviving the harsh post-apocalyptic world of The Last of Us requires more than just sharp instincts and stealth tactics. Upgrading your firearms at workbenches is essential to surviving brutal encounters with infected and hostile human factions. To unlock higher tier upgrades for your arsenal, finding toolboxes hidden throughout the campaign is absolutely critical.
Understanding Tool Levels and Workbench Upgrades
Tool levels dictate which weapon enhancements you can purchase at workbenches using collected spare parts. There are five distinct tool levels hidden across key story chapters, each unlocking advanced modifications like increased holster capacity and reduced weapon recoil. Missing a tool level can severely restrict your combat efficiency later in the story.
Workbenches are fixed points in the environment where Joel can spend spare parts to modify his gear. Higher tool tiers unlock game-changing benefits like faster reload speeds and increased firearm damage capabilities. Strategic planning ensures you prioritize the most effective upgrades early in your playthrough.
Where to Find Every Tool Box in the Game
The first set of tools is located early in Bill's Town inside the basement of the church hideout. Search the metal shelves near the armory equipment to secure tool level one before moving forward. Acquiring this first set immediately allows basic handling and capacity improvements for your pistols and shotguns.
Tool level two can be discovered in Pittsburgh shortly after escaping the flooded garage area in the hotel. Look inside the metal shed near the exit of the garage area to find the red toolbox sitting on a workbench. The remaining tool sets appear in the Suburbs, the University, and the Bus Depot chapters, often placed near main objectives or locked shiv doors.
Prioritizing the Best Weapon Modifications
Not all weapon upgrades offer equal value during tense survival scenarios across various difficulty settings. Weapon holster upgrades should always take top priority because switching guns quickly during active combat saves vital seconds. Increasing magazine capacity for shotguns and rifles also ensures you are never caught reloading during overwhelming horde attacks.
Weapon stability and fire rate upgrades are ideal secondary investments for precision weapons like the hunting rifle and bow. Reducing sway allows for reliable headshots against distant armored enemies while conserving precious ammunition. Balancing your part expenditure between primary sidearms and long-range rifles creates a versatile arsenal ready for any encounter.
Tips for Resource Management and Scavenging
Scavenging every corner of the environment is necessary to gather enough spare parts for your weapon upgrades. Check drawers, open safes, and explore optional side rooms to maximize the parts you bring to each workbench. Conserving shivs to open locked doors frequently yields high-value part caches alongside essential crafting materials.
It is important to remember that tool levels and weapon progress carry over into New Game Plus modes for subsequent playthroughs. This feature allows players to complete fully upgraded weapon trees that were impossible to finish during a single run. Plan your choices carefully so you can master combat efficiency across every chapter.

The Last of Us Tools Locations and Weapon...
Surviving the harsh post-apocalyptic world of The Last of Us requires more than just sharp instincts and stealth tactics. Upgrading your firearms at workbenches is essential to surviving brutal encounters with infected and hostile human factions. To unlock higher tier upgrades for your arsenal, finding toolboxes hidden throughout the campaign is absolutely critical.
Understanding Tool Levels and Workbench Upgrades
Tool levels dictate which weapon enhancements you can purchase at workbenches using collected spare parts. There are five distinct tool levels hidden across key story chapters, each unlocking advanced modifications like increased holster capacity and reduced weapon recoil. Missing a tool level can severely restrict your combat efficiency later in the story.
Workbenches are fixed points in the environment where Joel can spend spare parts to modify his gear. Higher tool tiers unlock game-changing benefits like faster reload speeds and increased firearm damage capabilities. Strategic planning ensures you prioritize the most effective upgrades early in your playthrough.
Where to Find Every Tool Box in the Game
The first set of tools is located early in Bill's Town inside the basement of the church hideout. Search the metal shelves near the armory equipment to secure tool level one before moving forward. Acquiring this first set immediately allows basic handling and capacity improvements for your pistols and shotguns.
Tool level two can be discovered in Pittsburgh shortly after escaping the flooded garage area in the hotel. Look inside the metal shed near the exit of the garage area to find the red toolbox sitting on a workbench. The remaining tool sets appear in the Suburbs, the University, and the Bus Depot chapters, often placed near main objectives or locked shiv doors.
Prioritizing the Best Weapon Modifications
Not all weapon upgrades offer equal value during tense survival scenarios across various difficulty settings. Weapon holster upgrades should always take top priority because switching guns quickly during active combat saves vital seconds. Increasing magazine capacity for shotguns and rifles also ensures you are never caught reloading during overwhelming horde attacks.
Weapon stability and fire rate upgrades are ideal secondary investments for precision weapons like the hunting rifle and bow. Reducing sway allows for reliable headshots against distant armored enemies while conserving precious ammunition. Balancing your part expenditure between primary sidearms and long-range rifles creates a versatile arsenal ready for any encounter.
Tips for Resource Management and Scavenging
Scavenging every corner of the environment is necessary to gather enough spare parts for your weapon upgrades. Check drawers, open safes, and explore optional side rooms to maximize the parts you bring to each workbench. Conserving shivs to open locked doors frequently yields high-value part caches alongside essential crafting materials.
It is important to remember that tool levels and weapon progress carry over into New Game Plus modes for subsequent playthroughs. This feature allows players to complete fully upgraded weapon trees that were impossible to finish during a single run. Plan your choices carefully so you can master combat efficiency across every chapter.

Elden Ring Kenneth Haight Questline: Complete Walkthrough and...
Kenneth Haight is one of the earliest noble NPCs players encounter during their journey through Limgrave in Elden Ring. Calling himself the rightful ruler of the region, he tasks the Tarnished with reclaiming his stronghold. Completing his questline provides valuable early-game weapons, lore depth, and ties directly into the broader political future of Stormveil Castle.
Finding Kenneth Haight and Reclaiming Fort Haight
Kenneth Haight is initially found standing atop a ruined archway located in northeastern Limgrave, calling out for assistance. Speaking to him reveals that his ancestral home, Fort Haight, has been overtaken by a knight commander. He asks you to travel south to the fort, clear out the hostile forces, and restore order to the area.
To fulfill his request, head to the southeastern tip of Limgrave to locate Fort Haight. Defeat the Godrick Knight guarding the upper battlements, who drops the powerful Bloody Slash Ash of War upon defeat. After securing the fort, return to Kenneth on the ruins to report your victory and receive your initial reward.
Pledging Service and Returning to Fort Haight
Upon telling Kenneth that the fort is cleared, he rewards you with an Erdsteel Dagger. Exhausting his dialogue allows you to pledge your service to him, after which he promises to hold a knighting ceremony at Fort Haight. When you return to the fort, you will discover it has been overrun by Demi-Humans and Kenneth is unable to knight you just yet.
At this stage, Kenneth mentions that he must seek a true and proper ruler for Limgrave before fulfilling his promise. His narrative temporarily stalls here until you make significant progress in other major character questlines. Players can choose to continue his story or leave him monitoring the fort.
Connecting with Nepheli Loux and the Throne Room Conclusion
To conclude Kenneth's questline, players must advance Nepheli Loux's storyline by giving her the Stormhawk King. Additionally, you must defeat Morgott the Omen King in Leyndell to trigger the final movement of these characters. Once these conditions are met, Kenneth moves to the Stormveil Castle throne room alongside Nepheli and Gatekeeper Gostoc.
In the throne room, Kenneth pledges his allegiance to Nepheli as the new ruler of Limgrave. While Kenneth himself does not hand over further items, completing this joint narrative allows Nepheli to give you an Ancient Dragon Smithing Stone. Gostoc will also open an expanded shop selling a second Ancient Dragon Smithing Stone, making the quest extremely worthwhile for weapon upgrades.

My Name Is Earl GIF And Where The...
Internet meme culture frequently resurrects classic moments from beloved television shows, turning short character expressions into universal social media reactions. Among the most famous is the classic drink reaction GIF originating from the hit 2000s comedy series My Name Is Earl. This hilarious visual reaction continues to circulate across online forums, social platforms, and messaging apps as a go-to expression for shock, disgust, or comical disbelief.
The Origin of the Famous My Name Is Earl GIF
The iconic reaction snippet comes directly from the NBC sitcom My Name Is Earl, which aired from 2005 to 2009. The scene prominently features Darnell "Crabman" Turner, played by actor Eddie Steeples, reacting in shock. His sudden, dramatic facial reaction while taking a drink quickly became one of the most memorable visual gags from the entire series.
While many viewers recognize the face instantly, younger internet users often encounter the clip as a standalone meme. Understanding its sitcom roots adds a layer of appreciation for how well-timed comedy translates into digital reaction media. The scene highlights the show's signature physical humor that made it a fan favorite during its original broadcast run.
Why the Reaction Resonates Across Social Media
Reaction GIFs thrive because they communicate complex emotional responses instantly without requiring lengthy text explanations. The visual of someone spitting or double-taking while drinking perfectly captures feelings of sudden realization, awkward surprises, or absurd online news. Because the facial expression is so exaggerated and genuine, it fits seamlessly into everyday online conversations.
Digital platforms like Reddit, X, and forum threads frequently rely on short animation loops to convey humor. The character's expressive eyes and timing make the moment endlessly repeatable. Many users share memes to express relatable everyday moments of disbelief or comedic shock.
The Legacy of My Name Is Earl in Digital Culture
Created by Greg Garcia, My Name Is Earl stood out for its single-camera style, vibrant characters, and focus on karma and redemption. Characters like Earl, Randy, Joy, and Darnell brought a unique energy to television that continues to hold up decades later. The show's enduring popularity on streaming platforms ensures new generations discover its unique humor.
The continued spread of its reaction GIFs shows how quality television writing leaves a lasting footprint on modern internet communication. Whether used to respond to wild news, sports highlights, or funny social media posts, this clip remains a timeless piece of digital humor. It serves as a great bridge connecting mid-2000s network television with today's fast-paced meme ecosystem.

What Do Chickens Eat In Stardew Valley And...
Raising poultry is one of the most rewarding early-game endeavors in Stardew Valley, offering players a steady stream of fresh eggs and steady profits. However, keeping your flock thriving requires a solid understanding of their dietary needs and overall mood mechanics. Ensuring your coop remains well-stocked and welcoming is the secret to unlocking high-quality produce every single day.
Understanding the Chicken Diet in Stardew Valley
Chickens in Pelican Town primarily feed on two main food sources: fresh grass and harvested hay. During the sunny days of Spring, Summer, and Fall, letting your birds graze outside allows them to eat live grass directly from the soil. When kept indoors or during rainy weather, they rely entirely on hay placed inside the feeding bench of their coop.
Fresh grass is always the preferred option because it boosts their mood significantly more than dried fodder. You can plant grass starter around your farm to create lush grazing pastures for your flock. If grass is unavailable, you can purchase hay directly from Marnie's Ranch or harvest it yourself using a scythe on wild weeds.
Daily Routines for Maximum Happiness
Maintaining high happiness levels requires daily interaction and proper coop management. Interacting with each chicken every morning raises their friendship score, which directly influences egg size and quality. Additionally, opening the small coop door early in the morning allows them to stretch their legs and forage outdoors.
Weather conditions play a massive role in how your birds feel throughout the season. Chickens strongly dislike rain, storm conditions, and the freezing cold of Winter, so keep their door closed on bad days. Forgetting to feed them or leaving them trapped outside overnight will cause their mood and affection levels to drop rapidly.
Essential Winter Care and Coop Upgrades
Winter presents a unique challenge for livestock owners as all wild grass dies off completely. To keep your flock content during the cold months, you must install a heater inside the coop, which can be purchased from Marnie. A heater ensures your birds stay warm and cheerful, preventing any dip in egg production.
Upgrading your standard coop to a Deluxe Coop streamlines the feeding process immensely. The Deluxe version features an automated feeding system that automatically distributes hay from your silos onto the bench every morning. This saves valuable time while guaranteeing that no chicken ever goes hungry due to an oversight.
Unlocking Higher Quality Eggs and Profits
Happy and well-fed chickens regularly reward farmers with large eggs and even rare golden or iridium quality yields. Consistently feeding them fresh grass, petting them daily, and protecting them from harsh weather builds maximum friendship over time. Higher quality eggs sell for significantly more gold and process into superior quality mayonnaise, maximizing your farm income.

Red Dead Redemption 2 Graves Locations And Complete...
The vast world of Red Dead Redemption 2 is filled with deeply emotional stories that continue to resonate with players long after the main story concludes. One of the most meaningful post-game tasks involves tracking down the final resting places of your fallen companions from the Van der Linde gang. Finding all nine locations is required to achieve full completion and unlocks a special achievement that serves as a beautiful tribute to the journey.
The Emotional Weight of the Memorial Quest
Visiting these burial sites provides players with an opportunity to reflect on the tragic events that unfolded across the game's chapters. Each location features a uniquely detailed headstone or marker that mirrors the personality and life of the character buried there. Approaching these locations prompts John Marston to pay his respects, creating a somber yet rewarding experience for dedicated fans.
This journey serves as a powerful reminder of the bonds formed throughout Arthur Morgan's story. Tracking them down requires significant exploration across diverse terrains, from snowy peaks to marshy lowlands. Dedicated players often find that completing this task brings a profound sense of narrative closure to the epic western tale.
Finding the Northern Burial Sites
Several of your former allies are laid to rest in the northern regions of Ambarino, where the environment is harsh and isolated. Up in the snow-covered mountains near Spider Gorge, you can locate Davy Callander's simple wooden marker near the abandoned church. Further east, past the desolate fields of Donner Falls, rests the final monument for Arthur Morgan on a beautiful mountain ledge overlooking the valley.
Not far from Arthur's site, players can also pay tribute to Eagle Flies near the glorious Wapiti Indian Reservation. Checking these elevated areas ensures you experience some of the most scenic backdrops the map has to offer. Be prepared for steep climbs and cold weather conditions as you navigate these rocky northern peaks.
Locating Companions in Lemoyne and New Hanover
Moving south into the wetlands and plains reveals additional grave sites that are critical to completing your collection journey. In the heart of the Bayou Nwa region, the final resting place of Lenny Summers and Hosea Matthews can be found side by side under a massive tree. This peaceful woodland spot stands in stark contrast to the chaotic bank robbery that claimed their lives in Saint Denis.
Further west, near the abandoned battlefield of Bolger Glade, lies Sean MacGuire among the tall grass. Additionally, Susan Grimshaw is buried on a lonely hillside just south of the old Beaver Hollow camp. Taking the time to locate these spots rewards you with unique dialogue and a deeper appreciation for the game's lore.
Completing the Journey for the Achievement
To register each visit successfully, players must ensure their character actively inspects the headstone until the entry is written down. Finding all nine spots unlocks the Paid Respects trophy, marking a significant milestone for perfectionists. It is recommended to undertake this grand tour during the epilogue when the entire map becomes fully accessible for exploration.
Plan your travel routes efficiently to avoid unnecessary backtracking across the massive world map. Immersing yourself in this memorial hunt allows you to experience the map from a completely new perspective. It stands out as one of the most well-crafted environmental storytelling features in modern gaming history.

RDR2 How To Fast Travel And Unlock Every...
Traversing the massive, beautifully detailed open world of Red Dead Redemption 2 is an unforgettable experience, but sometimes you just want to reach your destination quickly. The game offers several ways to skip long horse rides, ranging from public transportation to unlockable camp upgrades. Understanding how these mechanics function can drastically improve your efficiency while hunting down collectibles or completing distant missions.
Unlocking the Ledger and Upgrading Arthur's Camp
The most convenient way to move around the map becomes available after completing several story missions in Chapter 2. You will need to complete money lending quests for Leopold Strauss to unlock the camp Ledger. Once the Ledger is active, players can invest funds to upgrade the camp lodging systems.
Purchasing the first lodging upgrade improves Dutch’s tent and encourages other gang members to donate more money. Following this, you can purchase the next upgrade, which unlocks a special fast travel map on the back of Arthur’s wagon. This map allows you to immediately teleport to major settlements and discovered towns free of charge.
Setting Up the Handy Wilderness Camp
For players stranded deep in the wild without access to a major settlement, the wilderness camp is an essential survival tool. By opening your item wheel, you can establish a temporary campfire almost anywhere on flat ground. This mechanic allows you to cook food, craft items, and rest your horse after a long journey.
An excellent feature of this setup is that it allows Arthur to initiate travel directly from the wilderness. Once you have unlocked the main camp map upgrade, the wilderness option also gains teleportation capabilities. This ensures you can always find a quick route back to civilization from remote mountain peaks or dense forests.
Utilizing Stagecoaches and Train Networks
If you prefer not to spend money on camp upgrades early in the game, public transit provides a great alternative. Stagecoaches are readily available at major hubs and can carry you to previously discovered towns for a small fee. You simply need to approach the driver icon on your map to purchase a ticket.
Trains operate similarly but offer a unique advantage by letting you visit locations you have not yet explored on foot. You can purchase a train ticket from any local post office clerk to ride the rails across state lines. This method is incredibly useful for opening up the map during the opening hours of your adventure.
Cinematic Mode and Automatic Horse Navigation
While not a traditional teleportation mechanic, cinematic mode functions as a hands-free method for covering long distances. If you place a waypoint on your map and get your horse up to a steady gallop, holding the camera button activates this mode. Your horse will then automatically follow the designated trails to your exact destination.
This option allows you to sit back and enjoy the stunning landscapes without constantly steering. However, players must remain cautious as random roadside ambushes or wild animal attacks can still occur during the journey. It serves as a perfect middle ground for those who want to immerse themselves in the world without active steering.

human fall flat steam level Steam Level Guide...
The Steam level in Human Fall Flat brings a unique industrial flavor to the physics-based puzzle platformer, tasking players with managing pressure, pipes, and massive machinery. Navigating this environment requires a solid understanding of how steam power functions within the game's quirky physics engine. This guide provides a complete walkthrough to help you conquer every mechanical obstacle efficiently.
Understanding the Core Steam Mechanics
Before diving into the complex puzzles, players must master the art of connecting pipes and turning valves to direct the flow of vapor. Throughout this zone, you will encounter various colored pipes scattered across the factory floor that must fit perfectly into designated furnaces. Ensuring a tight connection allows pressure to build up, which eventually powers the local moving platforms and heavy steel doors.
It is important to remember that momentum plays a significant role when dragging these heavy components across the map. If you find your character struggling to align a pipe segment, try pulling it from a different angle or resetting your grip entirely. Taking a methodical approach to these interactions prevents the physics engine from throwing your objects into hard-to-reach places.
Navigating the Main Valve Room
Once you reach the central hub of the facility, you are greeted by a massive network of boilers and overhead walkways. The primary objective here involves activating three separate pressure gauges simultaneously to unlock the path forward. Players need to explore the surrounding sub-rooms to find the missing wheels that screw onto the main control panel.
Be careful when navigating the high ledges in this area, as a single slip can send you tumbling back to the lower level. Utilizing the wobbly swinging ropes effectively is key to reaching the higher platforms where the hidden wheels reside. Keep your eyes open for alternative routes, as some shortcuts can save you a significant amount of climbing time.
Solving the Final Generator Puzzle
The climax of the stage involves a massive electrical generator that requires a constant supply of high-pressure vapor to function. Players must coordinate a series of rapid pipe swaps while managing a ticking clock triggered by a pressure release valve. Successfully balancing the input and output streams will spin the generator up to its maximum operational capacity.
After the machine powers on, a final crane mechanism will activate near the back wall of the factory floor. Grab onto the dangling hook with both hands and swing yourself across the gap toward the exit portal to complete the level. Working patiently through these steps ensures a smooth finish to one of the game's most intricate industrial environments.

best earth defense force game Top Earth Defense...
The Earth Defense Force series has established a legendary reputation among gaming enthusiasts for its unapologetic commitment to pure arcade action, chaotic multiplayer fun, and massive bug-slaying spectacles. Navigating through the franchise can be a daunting task for newcomers given the numerous iterations, spin-offs, and generational updates. Ranking the top entries helps players identify which titles offer the most polished mechanics, satisfying gameplay loops, and enduring community support.
Earth Defense Force 6 Takes the Ultimate Crown
The latest mainline entry represents the absolute pinnacle of the series by building directly upon previous narratives while fixing long-standing technical issues. Players enjoy a significantly smoother framerate even during the most chaotic moments when hundreds of alien invaders fill the screen simultaneously. It retains the signature campy humor and hilariously cheesy voice acting that veterans have grown to love over the decades.
Furthermore, the game introduces a much higher level of enemy variety early in the campaign to keep the progression feeling fresh and engaging. The inclusion of subtle story details and structured character arcs adds an unexpected layer of depth to the otherwise straightforward insect-exterminating formula. This perfect combination of performance stability and content variety cements its position at the absolute top of the franchise hierarchy.
Earth Defense Force 5 Remains a Masterclass in Game Design
Before its successor arrived, the fifth entry was universally praised as the gold standard entry point for anyone curious about the universe. It served as a complete reboot for the storyline, making it incredibly accessible for players who wanted to skip earlier generational jank. The title brought monumental quality-of-life changes across all distinct soldier classes, including custom vehicle call-ins and optimized collection radiuses.
The overall weapon balancing and difficulty scaling in this release are exceptionally well-tuned, providing a rewarding challenge without feeling entirely unfair. Many long-time fans still consider the combat balance here to be the most satisfying in the entire lineage of the series. It effectively traded oversized enemy numbers for smarter, more durable threats that required tactical class coordination.
Earth Defense Force 4.1 Offers Pure Nostalgic Scale
For those seeking the definitive classic experience, this remastered title stands as an epic monument to the older style of design. It delivers massive, sprawling hordes of giant ants and colossal mechanical invaders that truly capture the feeling of fighting a hopeless planetary war. The game is specifically remembered for introducing massive walking fortresses that allow players to engage in kaiju-style brawls.
While it lacks some of the modern movement refinements found in newer versions, the sheer level of chaotic fun remains entirely unmatched. The community often praises this specific iteration for having the best musical selections and the most memorable mission layouts. It remains a beloved classic that showcases exactly what made the franchise a cult hit in the first place.
Choosing the Right Starting Point
Deciding which title to purchase depends entirely on whether you value technical refinement or historical preservation. Newcomers looking for modern conveniences and a highly active online player base will naturally gravitate toward the newest releases. However, exploring the older catalog offers a fascinating look at how these ambitious developers gradually perfected their unique cooperative shooter formula over multiple console generations.

Raptors Black Feathers Elden Ring Location and Related...
The Lands Between are filled with numerous armor sets that provide distinct statistical advantages to help players survive harsh combat encounters. Among these specialized gear pieces, the Raptor's Black Feathers chest armor stands out as a crucial asset for offensive builds that rely heavily on vertical movement. This article provides a comprehensive overview of where to find this exceptional armor piece and explores the unique rewards associated with its discovery.
Finding the Sage's Cave in Altus Plateau
To acquire the Raptor's Black Feathers, players must navigate to the Altus Plateau region and seek out a hidden dungeon known as the Sage's Cave. This location can be found in the western cliffs of the region, situated just northeast of the Abandoned Coffin site of grace. The entrance is tucked away near the shallow waters, making it easy to miss if travelers do not closely examine the rock formations.
Once inside the cave, players will immediately notice that the environment is incredibly dark and filled with illusory walls. Navigating these hidden pathways requires striking the cave walls to reveal secret chambers containing valuable treasures. Striking the first few walls will open up the main path leading deeper into the subterranean network.
Locating the Raptor's Black Feathers Chest
As adventurers advance through the Sage's Cave, they will encounter several skeletal enemies guarding the narrow pathways. After defeating these threats, players must search for a small room that features two treasure chests placed side-by-side against a wall. One of these containers holds the coveted skeletal mask, while the other contains the iconic feather-adorned cloak.
Opening the correct chest instantly rewards players with the Raptor's Black Feathers armor piece. It is highly recommended to clear out the surrounding skeletal warriors before attempting to loot the area to avoid unexpected interruptions. Obtaining this item early in the exploration of Altus Plateau can significantly alter a character's offensive capabilities.
Unique Combat Enhancements and Rewards
The primary appeal of the Raptor's Black Feathers lies in its passive mechanical property, which boosts jump attack damage by approximately ten percent. This special enhancement applies to all weapon types, making it exceptionally powerful when paired with heavy colossals or dual-wielded status effect setups. Players looking to maximize their damage potential frequently integrate this chest piece into their specialized character configurations.
Furthermore, this passive damage increase stacks multiplicatively with other similar items, such as the Claw Talisman. Combining these equipment choices allows players to unleash devastating airborne strikes that can break enemy poise relatively quickly. This strategic synergy makes the armor highly popular among both cooperative players and competitive duelists alike.
Additional Secrets Within the Cave
Beyond the armor set, the Sage's Cave offers several other valuable rewards for thorough explorers who challenge its dual bosses. The dungeon features two distinct boss encounters, including a Black Knife Assassin who drops the Concealing Veil talisman upon defeat. This additional reward grants players temporary invisibility while crouching at a distance, providing excellent utility for stealth mechanics.
The second boss encounter features Necromancer Garris, who rewards successful challengers with the Family Heads flail weapon. Exploring every corner of this cave ensures that players walk away with a diverse array of combat tools. Taking the time to fully conquer this location provides immense value for any playstyle in the game.

Is Dungeon Defenders 2 Cross Platform Multiplayer Guide
Dungeon Defenders 2 has captured the hearts of tower defense and action RPG fans alike with its cooperative gameplay and chaotic enemy waves. As players team up to protect Etheria, many wonder if they can team up with friends who are using different gaming consoles or systems. Understanding the cross-platform capabilities of this title is essential for anyone looking to optimize their multiplayer experience with friends.
The Current State of Cross Platform Play
Dungeon Defenders 2 does not support cross-platform multiplayer between different ecosystems. Players on PC, PlayStation 4, and Xbox One are isolated within their respective networks and cannot join the same lobbies. This limitation means you can only match and defend your towers alongside players who are using the exact same hardware platform.
While many modern cooperative titles have adopted full crossplay, this particular entry relies on separate servers managed by each platform holder. Chromatic Games has previously cited technical barriers, including engine limitations and certification differences, as the primary reasons for keeping the player bases divided. Consequently, you will need to coordinate with your friends to ensure everyone is playing on the same device type.
Technical Barriers and Server Limitations
The architecture behind Dungeon Defenders 2 was built during a different era of console gaming when cross-network connectivity was rarely implemented. The game utilizes Unreal Engine 3, a framework that presents significant engineering challenges when trying to bridge network protocols across Sony, Microsoft, and Steam infrastructure. Developing a unified matchmaking backend for an older engine requires resources that are often outside the scope of smaller development studios.
Furthermore, in-game economies and platform-specific microtransactions complicate the implementation of shared profiles or crossplay features. Exclusive items tied to specific storefronts create legal and operational hurdles that are difficult to reconcile. For players seeking a newer experience with modern networking features, looking into other franchise iterations or updates might provide better alternatives.
How to Play Multiplayer With Friends
To enjoy cooperative matches with your friends, you must ensure that all participants are logged into the same platform ecosystem. Once everyone is on the same system, you can easily use the internal matchmaking system or invite friends directly through your platform's native social interface. Creating a private tavern acts as the perfect staging ground to coordinate your hero setups and strategies before launching into a map.
If you find yourself on a different platform than your squad, your only option is to start a fresh account on their preferred system. Since the game is free-to-play across all available devices, downloading an alternate version costs nothing but your time. While your progression and unlocked heroes will not transfer over, it remains the only definitive way to build defenses together.
Alternative Solutions and Future Outlook
While the sequel remains restricted by its hardware boundaries, the developers have experimented with newer networking capabilities in other franchise entries. For instance, the spin-off title Dungeon Defenders: Awakened received official cross-save support to allow progression transfers across PC and consoles. However, these modern implementations have not been backported to the second mainline entry due to the fundamental engine differences.
As the gaming landscape continues to evolve, the demand for connected ecosystems remains higher than ever. While it is highly unlikely that this specific title will receive a retrofitted crossplay update, keeping an eye on official studio announcements ensures you stay informed. For now, gathering your friends on a unified system remains the best strategy for conquering the toughest challenges Etheria has to offer.

Need for Speed Carbon PS2 Cheats and Unlockable...
Need for Speed Carbon brings intense nocturnal street racing and strategic territory wars to the PlayStation 2 console. While conquering Palmont City requires sharp driving skills and a reliable crew, players can use integrated cheat codes to gain immediate advantages. These inputs allow you to bypass initial financial restrictions and unlock unique visual modifications early in your career.
How to Input Cheats on the PlayStation 2
To successfully activate secrets in this classic racing game, you must input the button combinations at the main title screen. A correct entry will instantly trigger the corresponding reward, allowing you to prepare for your next race with extra resources. It is highly recommended to save your progress immediately after entering a code to ensure the modifications remain active.
Using button patterns like Down, Up, Left, Down, Right, Up, Square, and Triangle grants you an additional ten thousand dollars in Castrol Cash to jumpstart your career. Other inputs can alter your performance tools, such as entering Left, Up, Left, Down, Left, Down, Right, and Square to secure unlimited nitrous oxide for your vehicles. These quick modifications provide a perfect safety net when facing tough rival crews in the canyons.
Unlocking High Performance Cars Naturally
Beyond entering text or button combinations, the game rewards dedicated drivers with an extensive roster of unlockable vehicles through natural progression. The car list is divided into Tuner, Muscle, and Exotic classes, each offering distinct handling and acceleration properties across three tiers. Capturing specific territories from rival bosses is the primary method for expanding your personal garage.
For instance, dominating the Starlight Strip or Diamond Hills areas allows players to claim elite tier three machines like the Ford GT and the Chevrolet Corvette Z06. Defeating final bosses or finishing specific challenge series events will also award high-performance vehicles that are completely unavailable at the start of the game. Managing your collection properly ensures you always have the right vehicle type for different racing conditions.
Customizing Vehicles and Maximizing Your Garage
Visual customization is another major component of the street racing lifestyle, and certain codes unlock specialized graphic options. By pressing Right, Up, Down, Up, Down, Left, Right, and Square, players can instantly apply the official game logo vinyls to their favorite rides. Another popular sequence using Up, Up, Down, Down, Down, Down, Up, and Square unlocks the unique Cardboard Box and Driver vinyl options.
If you enjoy sharing your customized designs and tracking your global racing accomplishments, utilizing an active Steam account offers a great way to engage with the broader gaming community. Collecting every car and combining visual modifications with performance upgrades allows you to dominate the streets in style. Balancing organic career progression with quick main menu secrets offers the most complete way to experience this legendary racing title.

FFXV Royal Arms Locations Complete Map and Weapon...
In Final Fantasy XV, hunting down the legendary armaments of ancient Lucian kings is one of the most rewarding pursuits available to players. Known as Royal Arms, these powerful tools grant Prince Noctis incredible stat boosts and unique combat movesets at the cost of consuming his own health during use. Locating all thirteen of these hidden treasures across the vast world of Eos is essential for unlocking Noctis's ultimate potential and maximizing your battle capabilities.
The Critical Role of Royal Tombs and Early Arsenal Unlocks
The journey to reclaim your ancestral power begins naturally during the main questline, introducing you to the location of early graves. Seven of the thirteen armaments are tied directly to story progression, ensuring players acquire a baseline of spectral weaponry. These initial blades and axes lay down the foundation for your Armiger abilities and provide static stat increments even when merely equipped in your active loadout.
For players hoping to track down the remaining gear, exploration through hidden maps and dangerous dungeons becomes necessary. The optional weaponry is tucked away inside labyrinthine structures that require deliberate side-tracking and survival skills. Conquering these hidden vaults demands proper preparation, as the guardians watching over the tombs scale high in level.
Mapping the Optional Royal Arms Across Eos
To secure a complete collection, you must venture off the beaten path into high-risk areas like the Myrlwood Forest or Balouve Mines. The Star of the Rogue, for instance, waits at the deepest point of a scenic northern dungeon guarded by a fierce boss creature. Similarly, the intimidating Sword of the Tall requires tackling the dangerous Costlemark Tower, a shifting puzzle dungeon that tests your patience and combat endurance.
Using a regional checklist allows you to systematically clear out the open world without missing these vital monuments. Each tomb houses an individual piece of history that shifts how Noctis navigates the battlefield through distinct warp-strike animations. Finding every site not only empowers your party but also completes a massive achievement milestone for completionists.
Strategic Integration and Managing the Health Cost
While the offensive modifiers of these phantom weapons are staggering, utilizing them thoughtlessly can quickly deplete your health bar. Experienced hunters often use specific pieces solely as passive stat enhancers rather than primary striking options. By placing items that boost strength or vitality into your weapon wheel, Noctis benefits from the numerical increases while striking safely with regular blades.
When you do choose to swing these ancestral relics, pairing them with high-recovery accessories or health-regenerating food buffs is heavily recommended. Using a balanced approach allows you to unleash devastation during critical combat phases without leaving yourself vulnerable to a sudden counterattack. Mastering this risk-and-reward loop is the true hallmark of an expert Lucian king.

Call Of The Dead Easter Egg Solo Steps...
Completing the classic Call of the Dead Easter Egg as a solo player remains one of the most rewarding challenges in Call of Duty Zombies history. Originally introduced in the Black Ops 1 era, this icy survival map tasks players with helping a trapped group of heroes secure a vital artifact. Navigating the treacherous Siberian coastline alone requires unique strategies, precise timing, and careful point management to succeed without cooperative teammates.
Securing the Fuse and Powering the Lighthouse
The journey begins by safely turning on the map power switches and heading straight to the massive central lighthouse structure. Once inside, you must interact with the locked vault door where the original characters are trapped to initiate the main quest line. Your initial objective is to find a hidden electrical fuse located randomly around the upper rooms of the laboratory building nearby.
After successfully grabbing the metallic fuse, return down to the vault door and place the component directly into the broken electrical box. You must then use an explosive weapon or a well-placed grenade to fix the jammed machinery right next to the door. Listening closely ensures you hear the audio cue that confirms the electrical grid is officially active and ready for the next phase.
Activating the Radios and Security Terminals
The next major step requires tracking down and activating four distinct communication radios hidden across the frozen landscape in a highly specific sequence. You must activate the first radio located on a technical console inside the power house building overlooking the ocean. Following that action, locate the second radio resting silently on top of some wooden shipping crates near the vulnerable Stamin-Up perk machine station.
The remaining communication devices must be found inside the cargo containers of the stranded freight ship and finally back down near the central vault room. Successfully activating them in this exact order will cause a brilliant beam of golden light to project directly from the top of the lighthouse. If you accidentally hit a radio out of order, simply advance the round to reset the audio puzzle sequences entirely.
Aligning the Mechanical Dials and Steering Wheels
With the beam of light shining, players must focus on adjusting a complex system of colored dials scattered across different floors of the lighthouse tower. The goal is to manipulate the numbering sequence until the matching colors line up correctly according to the hidden puzzle codes. Because turning one dial occasionally rotates the others, you should utilize systematic step guides to prevent infinite looping errors.
Simultaneously, you need to head over to the ship bridge to turn the steering wheel and pull the mechanical throttle levers into precise alignments. This action correctly positions the sub-oceanic pipes to handle the impending energy surge required to extract the final artifact. Balancing this mechanical manipulation while avoiding a full horde of aggressive undead testing your movement skills requires ultimate focus.
Retrieving the Golden Rod Artifact
The final phase requires using a specialized weapon to blast a charging Vril-Ya zombie directly under the brilliant beam inside the lighthouse structure. For solo players, obtaining the powerful Scavenger sniper rifle or the unique V-R11 weapon from the mystery box is completely essential to complete this step. Damaging the target directly beneath the focal point forces the rare Golden Rod artifact to descend cleanly down the spiral staircase.
Quickly grab the glowing object from the bottom floor and place it directly into the pneumatic transfer tube right next to the vault door. After a short period of dialogue from the trapped crew, a bright weapon power-up will manifest as your ultimate reward for completing the journey. This historic solo accomplishment permanently unlocks the powerful Wunderwaffe DG-2 weapon drop on the map for all subsequent matches.

How To Change Clothes In Red Dead Redemption...
Navigating the massive world of Red Dead Redemption 2 requires more than just a quick trigger finger and a reliable horse. The open-world environment features a dynamic weather system that actively reacts to your character's physical appearance and clothing choices. Knowing how to efficiently manage your wardrobe ensures that Arthur Morgan stays protected against severe weather conditions while maintaining a sharp appearance across the frontier.
Accessing Your Personal Wardrobe at Camp
The primary location to alter your appearance is at your gang's current base of operations. Players can walk over to Arthur's tent and interact with the clothing trunk to open up a comprehensive customization menu. This system allows you to select individual pieces of clothing, including shirts, pants, boots, and hats, to create a completely unique aesthetic.
As you progress through different chapters, your camp location will change, but your reliable trunk will always be placed near your bed. This makes it incredibly easy to refresh your style or plan your outfit before heading out on major story missions. Keeping a steady rotation of different clothing items will make your journey feel much more immersive.
Changing Your Outfits at Local Hotels and Tailors
If you find yourself far away from camp, regional towns offer convenient alternative options to modify your gear. Renting a room at a local hotel in towns like Valentine or Strawberry grants you instant access to a private wardrobe closet. This serves as an excellent fallback option when you need an immediate change of clothes during long regional hunting trips.
Additionally, visiting a tailor or a general store allows you to utilize their backrooms for trying on new purchases. Most clothing merchants feature an unmarked changing area complete with a mirror where you can manage your saved outfits. Utilizing these urban facilities keeps your character adaptable without forcing you to fast travel across the massive game map.
Managing and Storing Outfits on Your Horse
To prepare for sudden atmospheric shifts on the road, players can store custom clothing directly on their mount. While browsing your main wardrobe, you can select specific custom outfits and assign them to your horse's saddlebags. This feature allows you to change your clothes while exploring the wilderness without needing a physical building.
When standing near your horse, simply cycle through your item wheel to select the stored outfits instantly. Having a warm winter coat and a lightweight summer shirt ready on your saddle ensures that you never suffer from unexpected environmental exhaustion. It is a vital survival mechanic that every seasoned outlaw should master early in the story.
The Practical Benefits of Weather Appropriate Clothing
Choosing your daily attire is not merely a cosmetic choice; it directly affects your core attributes. Wearing heavy winter gear in the scorching swamps of Lemoyne will rapidly drain your health core due to overheating. Conversely, exploring the snowy peaks of Ambarino without a thick jacket causes your stamina to deplete at an alarming rate.
The game will explicitly notify you in the pause menu whether your current outfit is suitable for hot, average, or cold temperatures. Taking a few moments to evaluate your itinerary and dressing properly makes survival significantly easier. Managing these realistic elements enhances the overall tactical depth of your frontier experience.

Starfield Best Backgrounds and Traits
Crafting your initial character in Starfield is a massive decision that fundamentally shapes your journey across the Settled Systems. The combination of your starting history and inherent characteristics determines not only your initial skill set but also unique dialogue options and narrative paths. Choosing the right foundational elements ensures your spacefarer aligns perfectly with your intended playstyle from the very first leap.
Top Character Backgrounds for Early Advantages
The Bounty Hunter background stands out as an exceptional choice for players who want immediate access to essential mechanical utilities. This history grants early access to Boost Pack Training and Piloting, which are vital for both planetary traversal and space combat. By selecting this path, you secure a massive advantage in handling complex ship encounters during the early hours of exploration.
For those who prefer a mix of silver-tongued diplomacy and combat readiness, the Soldier background provides a highly balanced alternative. It rewards you with starting proficiencies in Fitness and Ballistics, making your character incredibly durable during intense boots-on-the-ground skirmishes. These reliable options minimize early-game frustrations and allow you to focus on learning the core loop of combat and survival.
The Most Impactful Traits for Exploration and Roleplay
Selecting your starting characteristics can drastically change how NPCs react to your presence and how you manage your daily resources. The Extrovert trait is highly recommended for players who enjoy traveling alongside a companion throughout their cosmic journey. This specific attribute reduces oxygen consumption when moving with a follower, which directly enhances your overall athletic performance on harsh planets.
Conversely, players who prefer a solitary approach can opt for the Introvert alternative to receive similar exploration buffs while wandering alone. Another highly fascinating selection is the Hero Worshipped characteristic, which introduces an enthusiastic fan who periodically gives you helpful items. This mechanical benefit adds a wonderful layer of organic humor and utility to your unfolding story.
Balancing Combat Capabilities and Economic Growth
Optimizing your early build requires a careful blend of defensive capabilities and financial stability across major city hubs. Backgrounds like the Cyber Runner offer an immediate boost to your stealth and security skills, which are perfect for hacking locked vaults. Gathering extra credits early on gives you the unique opportunity to purchase advanced weapon upgrades much faster than usual.
Combining these sneaky origins with the Alien DNA characteristic can drastically elevate your survivability during difficult alien encounters. This option permanently increases your maximum health and oxygen capacity at the cost of reduced healing item effectiveness. Balancing these pros and cons creates a highly rewarding progression curve that makes every choice feel distinct and valuable.

Witcher 3 Warble of a Smitten Knight Walkthrough
The Witcher 3: Wild Hunt features many memorable side quests, but few match the chivalric drama and hidden mystery found in The Warble of a Smitten Knight. Located in the picturesque region of Toussaint from the Blood and Wine expansion, this quest combines tourney competitions with a deeply personal story. Players stepping into Geralt's boots must balance athletic skill with keen detective work to uncover the secret troubling the tournament's patroness.
Beginning the Tourney Quest
To start this quest, head to the Tourney Grounds located east of Beauclair after completing the initial encounter with the Shaelmaar. Speak with Guillaume in the medical tent to learn about his devotion to Lady Vivienne and his suspicions regarding her unusual behavior. Agreeing to assist him allows Geralt to enter the grand tournament under an assumed identity or his official witcher title.
Preparing for the contest involves practicing the three core discipline events before the official matches begin. Taking time to test your skills at archery, horseback riding, and arena combat ensures you understand the timing required for victory. Mastering these trials gives Geralt the best chance to advance through the ranks smoothly.
Mastering the Tournament Challenges
The archery contest demands swift aiming as you shoot targets painted in specific colors against a time limit. Keeping a steady hand and firing as soon as your crosshairs align will secure an early lead over rival knights. Crossbow precision is critical, so equipping high-tier gear beforehand can make a noticeable difference in performance.
Next comes the horseback race, which requires navigating a tight course while striking dummies with your sword and shooting targets with your crossbow. Hitting these obstacles extends your remaining time, allowing Roach to reach the finish line without running out of stamina. Proper pacing along the track ensures a clean run through every checkpoint.
Investigating Vivienne's Secret
Between tourney rounds, Geralt must investigate Vivienne's quarters under the cover of night. Using Witcher senses reveals subtle clues around her pavilion, leading toward a mysterious creature hiding in the nearby woods. Following the trail uncovers the curse affecting her, shifting the quest's focus from sporting competition to a delicate moral dilemma.
Geralt learns that lifting the curse involves choosing between two distinct methods, each carrying unique consequences for Vivienne and Guillaume. Discussing these options with both characters helps you weigh the emotional and physical outcomes before making a final commitment. Your decision ultimately dictates how their story concludes after the arena battles finish.
Confronting the Final Arena Battle
The climax of the tournament brings Geralt into a team brawl followed by a dramatic duel against the defending champion. Coordination and careful dodging are essential when facing multiple armored opponents in the melee round. Utilizing Witcher Signs like Quen and Aksii provides vital crowd control during intense exchanges.
Defeating the champion in single combat secures the tourney victory and brings the grand spectacle to a close. Afterward, Geralt performs the chosen ritual to resolve Vivienne's affliction according to your earlier choices. Completing this quest rewards players with valuable gear, unique trophies, and a satisfying conclusion to one of Toussaint's most intricate storylines.

Hogwarts Legacy Follow The Trail Of Coins Walkthrough
Hogwarts Legacy offers players a magical open world filled with intricate mysteries, hidden treasures, and captivating side quests that expand the lore of the Wizarding World. One such mission is A Thief in the Night, which tasks students with investigating a series of mysterious overnight robberies in the small hamlet of Irondale. Successfully completing this side quest requires players to utilize their tracking skills to trace a scattered line of Galleons through dangerous terrain.
Starting the Irondale Side Quest
To begin this quest, you must travel to the settlement of Irondale located in the southern region of the world map. Once there, locate a goblin vendor named Padraic Haggarty who appears highly distressed about his family heirloom being stolen. Speak with him during the daytime to learn about the midnight thefts and officially kick off your magical investigation.
After gathering information from Padraic, you will need to advance the in-game clock to nighttime since the culprit only operates under the cover of darkness. You can easily wait for nightfall by opening your map interface and selecting the designated wait option. Once darkness falls, cast Revelio near the vendor stall to reveal the first set of clues left behind by the mysterious thief.
Tracking the Trail of Galleons
The tracking phase begins immediately outside the vendor area where bright gold coins will glow vibrantly under the influence of your Revelio charm. Follow these coins carefully as they lead away from the safety of the village and snake down a narrow dirt pathway. The trail will eventually lead you through a dense forest filled with towering trees and low hanging branches.
As you follow the currency deeper into the woods, you will eventually reach a major crossroad where the pathway splits into multiple directions. Pay close attention to the glowing markers because taking a wrong turn could accidentally lead you straight into a dangerous nearby enemy encampment. Continue heading toward the right side of the trail while regularly recasting your spell to keep the golden markers clearly visible.
Locating the Hidden Niffler Den
After navigating the upper cliffside pathways, the trail of coins will guide you directly toward a secluded area on the bottom left side of the region. Your quest objective will officially update as you approach a large rocky cave known locally as a Niffler den. This location is situated relatively close to the Feldcroft Catacomb Floo Flame landmark which makes returning here later quite convenient.
Inside this cavernous hideout, you will discover that the true culprit behind the village robberies is an untamed Niffler hoarding shiny objects. The creature will actively scramble around the den, requiring you to quickly equip and use your Nab-Sack utility to capture it securely. Once the magical beast is safely inside your inventory, climb up the rocky ledges within the den to locate the stolen Haggarty family heirloom resting on a pile of gold.
Returning the Haggarty Heirloom
With both the creature and the family heirloom in your possession, fast travel back to the Irondale Floo Flame to conclude the mission. Approach Padraic Haggarty at his usual vendor stall to deliver the surprising news that a Niffler was responsible for the local crime wave. You will then be prompted to return the precious item to the relieved goblin merchant.
During this final interaction, you can choose to return the heirloom freely or demand a small financial reward for your extensive tracking services. Regardless of your dialogue choice, completing the quest rewards you with valuable experience points and a unique cosmetic appearance item. This officially wraps up the investigation, allowing you to resume your grand adventure across the wizarding highlands.

Elden Ring Faith Dex Weapons And Best Build...
Creating a hybrid character in FromSoftware's massive action RPG requires a careful balance between your physical agility and divine spellcasting abilities. Combining high dexterity with deep faith allows players to wield exceptionally fast weapons while melting boss health bars with powerful incantations. This specific archetype offers some of the most versatile and visually spectacular playstyles available throughout the Lands Between.
Top Weapon Choices for Agility and Devotion
One of the standout armaments for this playstyle is the Winged Scythe, which can be acquired relatively early during your exploration. This weapon deals excellent holy damage alongside inherent blood loss buildup, making it highly effective against a variety of regular enemies. Its unique skill also prevents opponents from using healing flasks, providing a massive advantage during tricky encounters.
For players who prefer a heavier option, the Godslayer Greatsword offers an incredible alternative that breaks traditional weapon categories. Wielding this colossal sword requires significant investment, but its fast striking speed and unique black flame damage make it incredibly lethal. The weapon scaling favors dexterity heavily alongside faith, rewarding aggressive combat strategies during late-game boss fights.
Optimizing Your Stat Distribution
Allocating your leveling points efficiently is vital to ensuring your hybrid character remains viable as the difficulty increases. In the early stages of the game, prioritizing your physical survivability and base weapon requirements will help you maintain steady progress. Once you establish a solid foundation, you can begin evenly pumping points into both primary offensive attributes.
Reaching the soft caps for your chosen armaments ensures that your physical slashes and magical casts deal competitive damage. Balancing your stats around a level 150 target typically involves setting dexterity and faith to complementary levels depending on your primary main hand weapon. This approach ensures you cast your offensive incantations rapidly while retaining high melee efficiency.
Essential Incantations and Talisman Support
A major benefit of this setup is the immediate access to an expansive library of supportive buffs and ranged lightning spells. Utilizing defensive incantations like Golden Vow significantly increases your overall damage output while protecting your character from heavy incoming strikes. Woven into standard melee combos, fast-casting projectiles keep the pressure on nimble enemies from a safe distance.
To truly maximize your combat capabilities, equipping synergistic talismans that boost skill damage and lower casting times is highly recommended. Incorporating specialized equipment helps optimize the inherent strengths of your attributes while compensating for potential hybrid build weaknesses. Experimenting with different mixtures allows you to fine-tune your performance for both exploration and intensive boss battles.

Caelid Highway North Site Of Grace Location Guide
Elden Ring challenges players with its vast and unforgiving landscapes, where finding a safe haven is crucial for survival. The Astray from Caelid Highway North Site of Grace serves as a vital checkpoint for adventurers entering the rot-infested eastern region. Locating this specific site allows players to rest, replenish their resources, and prepare for the formidable trials that lie ahead.
Navigating the Path from Limgrave
To reach this checkpoint, players typically begin their journey from the northeastern borders of the starting region. Traveling past the Smoldering Church provides a direct route into the crimson terrain of Caelid. Following the primary road heading southeast will naturally guide you toward the target destination.
As you descend into the blighted lands, keeping to the main highway ensures you do not get prematurely lost in the treacherous wilderness. The path remains relatively straightforward, though players must remain alert for sudden enemy ambushes. Continued progression along this road will eventually reveal the glowing golden light of the checkpoint.
Pinpointing the Exact Location
The checkpoint itself is situated just west of the massive and dangerous Swamp of Aeonia. It rests comfortably along the northern fork of the main highway, acting as a gateway to deeper exploration. Players will know they have arrived when the environment shifts slightly away from the dense rot of the nearby waters.
Resting at this site provides a necessary reprieve from the environmental hazards plaguing the local area. It also serves as an excellent fast-travel hub for those who need to teleport back to safer zones. Activating it early ensures that sudden deaths will not result in massive progress loss across the region.
Interacting with the Nearby Merchant
One of the greatest benefits of securing this checkpoint is its immediate proximity to a valuable Nomadic Merchant. The vendor is located just east of the campfire, resting quietly alongside the highway fork. He offers essential survival supplies that can drastically alter your defensive capabilities in battle.
Adventurers can purchase specialized items such as Preserving Boluses, which are crucial for alleviating the build-up of scarlet rot. Additionally, he stocks various arrows and consumables that assist in ranged engagements against local monstrosities. Regular visits to this merchant can turn an otherwise grueling expedition into a manageable endeavor.
Surrounding Points of Interest
Establishing this site of grace unlocks easy access to several critical landmarks throughout northern Caelid. The terrifying heart of the swamp is only a short ride to the east, filled with rare upgrading materials. Furthermore, seasoned players can use this location as a staging ground to confront nearby field bosses.
Navigating the terrain requires a balanced understanding of enemy placement and terrain hazards. Utilizing your mount to leap over rot pools ensures you remain healthy while moving between major destinations. With this northern highway hub firmly established, conquering the rest of the region becomes a structured and strategic pursuit.

Gibdo Tears Of The Kingdom Locations And How...
Exploring the vast landscapes of Hyrule in the latest Zelda adventure introduces players to a wide variety of terrifying opponents. Among the most unsettling creatures roaming the ruins are the mummified horrors known as Gibdos. Overcoming these resilient monsters requires proper geographical knowledge and specialized tactical strategies to ensure Link survives the desert heat.
Primary Hunting Grounds in the Desert
The vast majority of these undead creatures spawn throughout the arid expanses of the Gerudo Desert region. Players will frequently encounter them wandering around the outskirts of Gerudo Town and near the ancient ruins buried under the sand. Exploring the localized caves and sinkholes scattered across the dunes will reveal hidden nests packed with multiple enemies.
For players attempting to gather crafting materials efficiently, tracking the locations of sand hives before completing regional main quests is essential. The subterranean passages beneath the desert ruins also house dense concentrations of these slow-moving threats. Planning your exploration around these landmarks guarantees a steady supply of combat encounters.
Understanding Gibdo Weaknesses
Engaging these monstrosities with physical weapons alone will yield highly discouraging results due to their extreme resistance to normal slashing attacks. Their durable outer shells protect them from standard iron blades and ordinary wooden arrows. To break this defense, players must first apply elemental damage such as fire, lightning, or intense bursts of water.
Exposing a monster to elemental reactions will immediately turn its gray skin a pale white, signaling that it is vulnerable to standard weaponry. Using physical items or powerful fusions during this temporary state will quickly deplete their remaining health pools. Maintaining a healthy distance while preparing your elemental counters prevents Link from taking unnecessary damage.
Advanced Tactics and Weapon Fusions
Utilizing special materials gathered from your journeys makes managing large groups of undead creatures significantly easier. Fusing shock fruit or fire fruit to your arrows allows for highly effective ranged targeting before the monsters close the distance. Additionally, activating regional companion abilities provides powerful area-of-effect elemental bursts without depleting your personal inventory.
Once their primary defenses are shattered, switching to rapid spears or high-damage claymores maximizes your offensive output during the vulnerability window. Defeating these opponents yields powerful bones that serve as excellent one-time offensive attachments for your projectiles. Strategic inventory management ensures you always possess the elemental tools required to dominate these encounters.

How To Find Trade URL On Steam Complete...
Trading virtual cosmetics and in-game items remains a foundational pillar of the modern PC gaming community. To exchange items safely with third-party marketplaces or friends without adding them directly to your friends list, locating your account's specific transfer link is essential. This customized web path allows external networks to securely view your public inventory offerings and generate instant transaction requests directly to your profile.
Navigating the Main Desktop Interface
Locating this specialized link begins by opening your primary desktop dashboard or accessing the web interface through a preferred browser. Move your mouse cursor toward your personalized profile name displayed prominently in the upper navigation column. From the resulting contextual dropdown listing, select the inventory inventory option to open your dynamic digital storage locker.
Once inside your digital item vault, look toward the upper right quadrant of the screen for the highlighted transaction requests box. Clicking this option re-routes your interface to the centralized dashboard handling all incoming and outgoing item proposals. This specific hub manages your community interactions and serves as the gateway to your hidden connectivity configuration.
Accessing the Inventory Configuration Panel
Within the transaction request panel, a secondary navigation sidebar contains several choices regarding your communication preferences. Scan the right side of the interface to locate the specific line labeled who can send me trade offers. Selecting this option reveals your localized settings regarding public interaction limits and third-party portal connections.
Scroll down toward the lower boundary of this settings area until you reach the specialized third-party websites module. This dedicated partition displays your active unique hyperlink alongside essential details explaining its function. Gamers frequently copy the text sequence found inside this field to facilitate fast automated transactions across legitimate trading hubs.
Managing Privacy Settings and Connection Security
For your unique sharing address to function properly, your overall profile layout must be configured to allow external visibility. Return briefly to your primary privacy options tab to confirm that both your profile configuration and inventory catalogs are toggled to public status. If either selection remains locked behind hidden or friends-only restrictions, external platforms will continuously experience delivery failures.
Maintaining absolute security over your digital assets requires checking this dashboard regularly to prevent potential unauthorized access attempts. If you suspect an external site has compromised your link or if you simply wish to stop receiving incoming requests, select the refresh button situated directly beneath the code box. This action instantly invalidates your previous address and issues a brand new path, giving you complete authority over who interacts with your digital collection.

Great Abandoned Central Mine TOTK Location And Complete...
Exploring the vast underground realm in Tears of the Kingdom presents unique challenges, especially when looking for major progression hubs. The Great Abandoned Central Mine stands out as one of the most critical subterranean locations due to the vital gameplay upgrade found within its borders. Pinpointing this subterranean facility allows players to unlock incredible building efficiencies that change how they traverse the rest of Hyrule.
Finding the Exact Depths Coordinates
Locating this massive underground facility requires venturing beneath the surface of the Great Plateau region. The precise map markers place the central terminal at coordinates -0660, -1500, -0518 deep within the cavernous depths. Navigating the pitch-black environment safely requires relying on glowing flora or nearby light sources to maintain visibility.
For the absolute fastest route down, adventurous travelers should dive directly through the Great Plateau North Chasm entrance. Plummeting down this specific opening drops you directly into the correct sector, making the remaining journey much shorter. From the landing point, look toward the glowing structure nearby to orient your travel direction.
Unlocking the Autobuild Ability
The primary reason to prioritize this destination is acquiring the definitive building efficiency upgrade known as Autobuild. Upon reaching the main staging platform, interacting with the dormant Steward Construct initiates the activation sequence. This crucial ability automatically remembers your recent vehicle configurations and lets you recreate complex projects instantly using nearby Zonaite materials.
Be prepared for a sudden spike in difficulty immediately after successfully restoring the system construct. A prominent boss encounter activates right on the platform, demanding proper combat preparation and a reliable stack of sturdy weapons. Defeating this leader clears out the immediate danger and secures the zone as a permanent fast travel waypoint.
Trading and Upgrading Resources
Beyond the immediate gameplay upgrades, this subterranean landmark operates as an essential trading hub for serious crafters. A fully operational Forge Construct resides inside the facility, offering massive quantities of valuable Crystallized Charges in exchange for mined Zonaite. Collecting these processed materials is the primary method for expanding your overall energy cell capacity back on the surface.
The zone also houses a hidden Bargainer Statue tucked beneath the main structure for players tracking down rare armor sets. Gathering the shadowy spirits scattered across the floor allows you to trade for unique equipment that mitigates environmental damage. Regularly revisiting this central location ensures your adventuring tools remain perfectly optimized for the challenges ahead.

How To Make Monkey In Infinite Craft Complete...
Infinite Craft has taken the gaming world by storm with its expansive universe where players combine simple elements to discover everything from mythical creatures to complex technology. One of the most popular and foundational creations players seek to uncover is the lively primate. Discovering the correct evolutionary path requires blending terrestrial items in a specific sequence to reach your goal. Understanding these core mechanics allows enthusiasts to master the crafting grid and unlock even more advanced combinations down the line.
The Fundamental Steps for Creation
To begin this crafting journey, players must utilize the basic starting elements provided at the start of the game. Combining water and earth results in a thriving plant, which serves as the foundational flora block. Merging wind and earth yields a pile of dust, another vital component for the final step. These initial steps are completely straightforward and set the stage for subsequent combinations.
Once you possess the initial ingredients, you must scale up your greenery to build a massive habitat. Combining the plant with earth forms a tree, which can be further merged with another tree to create a lush forest. Bringing two distinct forests together results in a dense jungle, completing the botanical side of the recipe. This sprawling habitat is necessary before introducing the final elemental trigger.
Finishing the Ultimate Crafting Combination
With both the dry particles and the dense tropical environment ready, you can finalize the recipe. Combining the dust block directly with your newly created jungle yields the target creature seamlessly. This complete sequence represents the fastest path to unlocking the basic primate element in your virtual repository. From here, players can branch out into thousands of humorous or complex sub-recipes.
Unlocking this specific element acts as a major stepping stone for pop culture recipes and advanced historical concepts. For instance, combining the primate with fire will generate a hot variation, leading down an entirely new path of discovery. Many players use this exact checkpoint to eventually forge legendary sci-fi scenarios or ancient evolutionary chains. The simplicity of the final merge makes it a highly reliable anchor point for creative experimentation.
Expanding Your Inventory Beyond the Basics
Once the creature is unlocked, the true sandbox nature of the browser experience begins to shine. Mixing your new creation with planets or human elements often yields surprising results that reference classic cinema and mythology. The game encourages extensive trial and error, ensuring that no discovery path is truly a dead end. Documenting these combinations helps building an extensive catalog for future crafting sessions.
As you continue experimenting, you will find that many complex elements share similar early game roots. Keeping a steady supply of basic environmental blocks allows you to quickly replicate recipes whenever you get stuck. Mastering the balance between organic habitats and elemental forces remains the best strategy for filling out your collection. The journey from basic water and earth to complex living entities highlights the addictive charm of this endless puzzle.

Mario Kart Super Circuit Unlockables Complete Unlock Guide
Released for the Game Boy Advance, Mario Kart Super Circuit brought fast-paced portable racing to fans worldwide while hiding a vast treasury of secret content. Unlocking everything in this classic title requires a mixture of high-speed racing precision, perfect item utilization, and gold cup collection across various engine classes. Players who dedication their time to mastering the tight drifting mechanics will discover new characters, challenging tracks, and even retro surprises.
Unlocking Secret Characters and Special Modes
While the initial roster offers a balanced selection of classic racers, completing the main Grand Prix modes reveals distinct rewards for dedicated drivers. To unlock the ultimate Time Trial ghost challenges, players must secure gold trophies across all standard cups in the game. These ghost races test your precision cornering and force you to maximize the benefits of short cuts and boost pads.
Additionally, obtaining gold trophies across the different engine classes changes the presentation of the main menu. The title screen background will shift to reflect your completion status, offering a visual badge of honor for veteran players. Successfully mastering these core tournaments is the first step toward achieving total completion in this handheld racer.
How to Access the SNES Retro Tracks
One of the most praised aspects of this Game Boy Advance entry is the inclusion of the entire track list from the original Super Mario Kart. To access these retro courses, drivers must collect a specific number of coins during their Grand Prix runs. You need to gather at least one hundred coins across a single cup while simultaneously winning the gold trophy.
Once you meet this condition, the corresponding Extra Cup will become available in the selection menu, featuring upgraded versions of the classic SNES stages. This requires players to balance aggressive driving with careful routing to collect coins scattered around each lap. Maintaining a high coin count also increases your top speed, making it easier to outpace aggressive computer opponents.
Earning the Coveted Three Star Driver Rank
True mastery of the game is measured by the ranking system evaluated at the conclusion of every Grand Prix cup campaign. The highest possible grade is the Three Star rank, which demands flawless performance from start to finish. To achieve this prestigious rating, you must win every single race in the cup while maintaining an exceptionally fast overall completion time.
Furthermore, your final rank drops significantly if you rely heavily on powerful catch-up items or take excessive environmental damage. Consistently driving on the optimal racing line and keeping your coin count near the maximum capacity are vital strategies for success. Only by minimizing mistakes and maintaining top speeds can you earn the top rating on every circuit.

Is There A Double Jump In Blasphemous Movement...
The dark and atmospheric world of Cvstodia challenges players with brutal combat and complex traversal mechanics that define the experience. Many gamers diving into this punishing side-scroller often wonder if standard genre staples are available to ease their journey. Understanding how the protagonist interacts with the environment is crucial for overcoming the game's toughest areas.
The Truth About the Double Jump Mechanic
Unlike many traditional Metroidvania titles, the original game does not feature a traditional mid-air jump mechanic. The developer purposefully excluded this standard traversal choice to maintain a heavy and grounded feel for combat. This design decision forces players to rely on timing, positioning, and precise platforming rather than airborne corrections.
Navigating the complex map requires careful observation of ledge placements and enemy attack patterns. Players must master basic jumps and ledge grabs to reach higher platforms scattered across the world. The absence of an extra vertical boost keeps the tension high during intense exploration segments.
How Movement Relics Change Exploration
While an actual double jump is absent, players can discover unique items known as Relics to alter the environment around them. These specialized items reveal hidden footholds, create new blood platforms, or protect the protagonist from toxic environmental hazards. They expand traversal capabilities significantly without altering the core physics of jumping.
Equipping the right Relic transforms how you perceive previously inaccessible gaps and high ledges. Instead of changing how the character moves, these relics alter the fabric of the map itself to allow forward progression. Finding these hidden upgrades is essential for uncovering every secret hidden in the game.
Alternative Mobility Options and Upgrades
The combat and traversal systems lean heavily into weighty mechanics like sliding and precise parrying. Players can upgrade their mobility by unlocking specific sword techniques that allow for lunging attacks across wide distances. Mastering these combat maneuvers often provides the extra reach needed to clear difficult gaps safely.
Vertical progression is also aided by climbing walls using your sword to anchor into soft surfaces. This mechanic allows for methodical climbing sections that require stamina and patience rather than rapid button inputs. Combining slides, standard jumps, and wall-clinging formulates the core loop of high-level exploration.
Adapting to the Grounded Gameplay Style
Surviving the harsh environments means embracing the deliberate pace set by the developers from the very beginning. Learning enemy spacing and hazard cycles will yield much better results than trying to rush through areas blindly. Patience remains the absolute best tool in any player's inventory when tackling complex vertical zones.
Adjusting to this grounded methodology might feel restrictive at first for veterans of more agile platformers. However, the intentional limitation creates a deeply rewarding atmosphere where every successful jump feels earned. Overcoming these strict boundaries is central to mastering the dark pilgrimage.

Castlevania Symphony Of The Night Cheats
Released in 1997, Castlevania Symphony of the Night revolutionized the action-adventure genre by introducing deep role-playing mechanics and a massive, interconnected map to explore. While mastering Dracula's shifting corridors requires sharp reflexes and dedication, the developers famously left a treasure trove of built-in codes and hidden modifiers to completely alter how players experience the campaign. Utilizing these classic features allows retro gaming enthusiasts to bypass standard progression barriers or experience entirely unique playstyles on subsequent playthroughs.
Unlocking Hidden Game Modes via Name Entry
The most iconic modifiers in the game are accessed directly through the file selection menu by entering specific names after completing the primary story once. Entering X-X!V''Q as your name grants Alucard a staggering boost to his luck stat, though this comes at the cost of drastically reduced baseline health and strength. This particular configuration is highly favored by item collectors because it drastically increases the drop rates for the rarest weapons and armor throughout the castle.
For players seeking a return to traditional linear action, typing RICHTER as the file name allows you to control the legendary whip-wielding hero instead of Alucard. Playing as Richter removes the inventory management system entirely and emphasizes raw arcade platforming, featuring his full arsenal of classic sub-weapons and martial arts techniques. Another code, AXEARMOR, starts Alucard with a unique set of blue armor that transforms him into a heavily armored axe knight variant with custom animations.
Mastering Unlisted Spell Combinations
Beyond traditional text codes, the protagonist has access to powerful unholy sorceries that can be executed at any point using specific directional d-pad inputs. Spells like Soul Steal require complex fighting game motions to cast but are incredibly useful for dealing massive area-of-effect damage while simultaneously restoring Alucard's health points. Learning these inputs early grants an immense advantage during difficult boss encounters without relying on standard item upgrades.
Another excellent magical ability is the Tetra Spirit command, which summons multiple projectile entities to seek out and destroy nearby enemies automatically. Using these inputs efficiently helps players control crowded rooms filled with high-tier monsters like Armor Lords or flying medusa heads. These abilities draw directly from Alucard's magic pool, making mana management a critical skill for players utilizing this tactical style.
Exploiting Environmental Glitches and Item Duplication
The original PlayStation release contains several sophisticated architecture exploits that allow speedrunners to pass through locked doors and access late-game zones prematurely. The most famous example involves utilizing the wolf form's high-speed dash alongside the map screen transition zones to glitch outside the intended boundaries of the Royal Chapel. Successfully pulling off these maneuvers allows experienced players to preserve Alucard's initial overpowered equipment, which Death normally confiscates at the start of the adventure.
Additionally, combining precise menu timing with the library card item lets players duplicate rare consumables and weapon sets near the Master Librarian's shop. While these techniques are technically unintended programming oversights rather than built-in features, they have become an integral part of the game's enduring legacy. Exploring these options provides a fascinating look into the structural design of one of history's greatest Metroidvania titles.

Halo Infinite The Tower Skull Skull Location and...
Finding hidden secrets in Halo Infinite adds an extra layer of challenge and excitement to the open-world campaign experience. Among the most coveted collectibles scattered across Zeta Halo are the hidden Skulls, which modify gameplay mechanics in bizarre and entertaining ways. Locating the specific collectible hidden at the third major mission structure requires both patience and a solid understanding of Master Chief's upgraded traversal tools.
Understanding the Importance of the Tower Skull
The particular modifier found at this imposing Banished fortress is the classic IWHBYD Skull, a fan-favorite across the franchise history. Activating this item makes rare combat dialogue happen much more frequently during standard gameplay encounters. This reward provides plenty of comedic relief as you fight your way through the dangerous alien ranks.Unlike some of the campaign collectibles that become locked behind completed missions, this specific structure remains accessible throughout your journey. Players can choose to grab it during the initial story assault or return later once the open map expands. Planning your vertical ascent carefully ensures that you do not waste time falling down the massive metallic structure.
Locating the Exact Position on the Structure
The prize is situated at the absolute highest point of the massive Banished installation known as The Tower. It rests safely on top of the central roof area, completely exposed to the open sky above. You will need to look closely near the support beams at the very peak to spot the glowing artifact.
Reaching this elevation requires navigating around the exterior framework rather than searching inside the interior hallways. Many players make the mistake of clearing out the lower levels expecting an internal elevator to take them to the roof. The secret path requires looking upward from the courtyard and utilizing the external architecture to reach the summit.
Mastering the Grappleshot Traversal Methods
The most direct method to scale the steep metallic walls involves upgrading the Master Chief's signature Grappleshot utility. You can repeatedly launch the hook at the support pillars to pull yourself higher before the cooldown resets. Combining quick turns with momentum swings allows you to bypass the traditional horizontal pathways entirely.
If scaling the vertical walls proves too frustrating, players can simply wait until they unlock flying vehicles later in the campaign. Piloting a Banished Banshee or a UNSC Wasp allows you to fly straight to the roof effortlessly. Landing directly on the platform saves significant energy and removes the risk of missing a grapple throw.
Preparing for the Final Ascent Challenges
Before launching your expedition to the roof, ensure that the immediate courtyard area is entirely cleared of hostile forces. Snipers and heavy artillery units can easily knock you out of the air while you are attempting tricky grapple maneuvers. Taking a few moments to eliminate the local defenders creates a much safer environment for exploration.
Once you successfully touch down on the top platform, walk toward the central structural peak to claim your prize. Interacting with the glowing object permanently unlocks the modifier across your entire campaign save file. With this fun new gameplay variation enabled, you are ready to continue your exploration of Zeta Halo with a renewed sense of accomplishment.